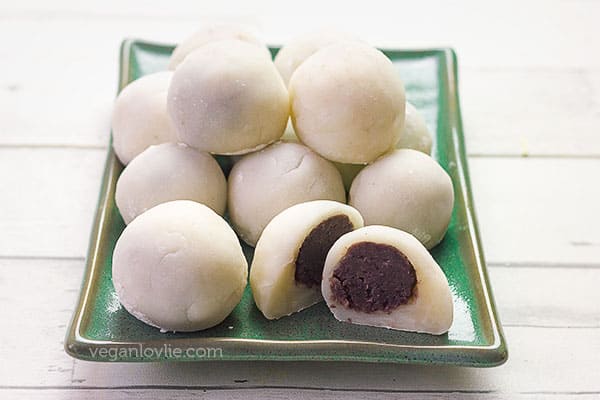
Soft delicate mochi balls filled with sweet homemade adzuki or red bean paste make a delicious dessert or snack. This red bean mochi recipe also includes sugar-free option and is made on the stovetop.
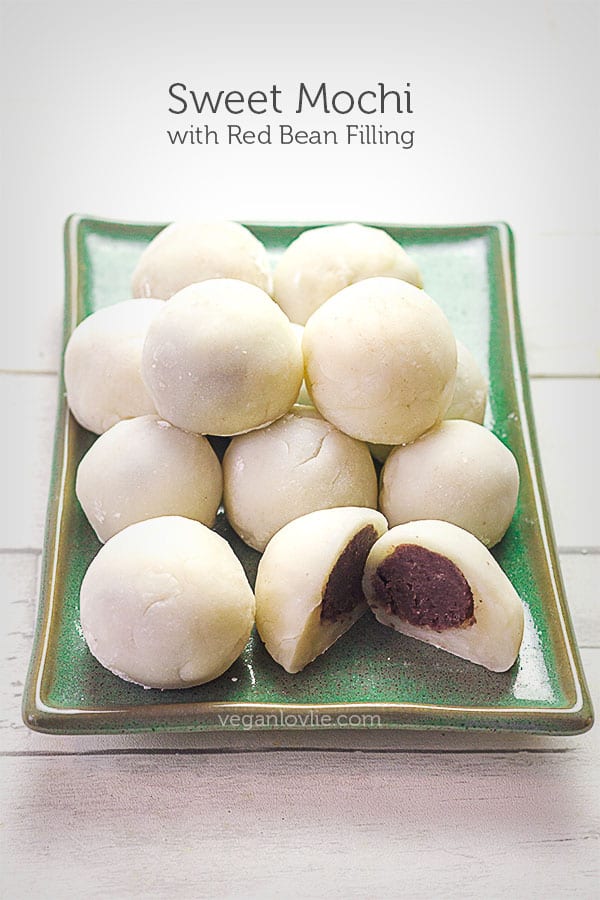
Glutinous rice cakes exist in many different versions and flavours, plain or filled. The one I am more used to is the banana glutinous rice rolled cake. But I’ll talk about them another day. Today, I’m sharing a different kind of glutinous rice cake which is the Red Bean Mochi (aka Daifuku mochi) that both Kevin and I are particularly fond of.
It seems that mochi is generally regarded as a tedious recipe to make. I don’t quite find this to be the case unless you really don’t like standing and constantly stirring for about 15 minutes or so. There are a few methods of cooking the mochi wrapper, the most popular being the microwave method, the steaming method or baking at low temperature over a long period of time.
I haven’t tried using either of these methods. Instead, I cook the glutinous rice flour directly in a saucepan along with the liquids. For this, a non-stick pan will help tremendously. This is one of the few occasions where I would recommend a non-stick pan.
If you prefer not to stand and stir, then I suggest you spread the glutinous rice flour mixture on a greased tray and bake at low temperature for a long period of time or steam it. If you decide to microwave the mixture, stir it half-way through, and microwave again until it is thick and malleable. Since I haven’t tried any of these methods for myself I can’t give real directions for either of them.
I find the stove-top saucepan method really not that difficult at all and it is my go-to method.
As for the filling, if you want to save time, you can get ready-made sweet red bean paste filling at an Asian grocery store (usually in the refrigerated/freezer section or in cans). I usually make the filling in advance. Any leftover red bean balls can be kept refrigerated or frozen; they are actually delicious to eat on their own as a snack.
Homemade red bean mochi is so much more delicious that store-bought. The coconut milk in the dough enhances the texture and makes it a lot more delicate while adding a nice layer of flavour too. If you give these red bean mochi balls a try, drop me a comment and let me know how yours turned out.
Where to find ingredients?
Adzuki beans can be found at most Asian grocery stores or online. Some regular grocery stores also carry it. Else you may just use red beans or red kidney beans.
Mochiko or glutinous rice flour is used to make the mochi wrapper. You’ll also find this at Asian grocery stores. I’ve found the Koda Farms brand to give the best results so far, both texture-wise and taste-wise.
To make the recipe sugar-free, you may use stevia powder. Stevia is a natural sweetener extracted from the leaves of the stevia plant. Some brands add maltodextin and other additives; I suggest to steer clear of these brands and choose one that provides 100% pure stevia powder. Check the recipe notes for how much to substitute with.
Red Bean Mochi Recipe

Soft delicate mochi balls filled with sweet adzuki or red bean paste make a delicious dessert or snack. The recipe for these red bean mochi balls also include sugar-free options.
Ingredients
Red Bean Paste Filling* (see notes)
- 100 g red beans or adzuki beans, dry (1/2 cup)
- 70 g golden or turbinado sugar**, (1/3 cup) or more, if you'd like it sweeter, see notes for sugar-free option
- 45 ml canned coconut milk, or water (3 tablespoons)
- 1/2 teaspoon vanilla extract, (2.5 ml)
- Water for soaking and boiling
Mochi Wrapper
- 225 g mochiko or glutinous/sweet rice flour, (1 1/2 cup) ****see notes for options
- 120 ml canned coconut milk, (1/2 cup)
- 60 ml water, (1/4 cup)
- 60 ml maple syrup***, (1/4 cup) see notes for substitutes/sugar-free option
- 5 ml vanilla extract, optional (1 teaspoon)
- Cornstarch
Instructions
For the red bean filling:
- Soak the red beans in plenty of water for at least 2-3 hours or better overnight. Rinse and drain.
- Place the beans in a large pot and fill with enough water to cover the beans by about an inch. Bring the water to a boil, then reduce the heat to medium and let cook partially covered.
- Keep an eye on the pot and add about 1/2 cup of water when the water boils down, to keep the beans submerged.
- After about an hour, test a bean by mashing it with a spoon or your fingers. If it just splits in halves, it's not ready yet. So keep cooking until it mashes easily.
- Turn off the heat and drain the beans (you may keep the water to use as aquafaba, although you'd only be able to use it in recipes where the red colour won't matter).
- Let the beans cool a little before adding them to a food processor with the sugar and process on high until smooth.
- I used a hand/immersion blender to do this. You may also use a fork to mash the beans and mix them with the sugar if you don't have a food processor or blender.
- Add the bean mash to the pot with the coconut milk or water and vanilla extract.
- Cook while stirring until a thick dough-like mouldable paste is formed.
- If the mixture is too sticky while stirring, you may add a tablespoon of coconut oil and use a silicon spatula for stirring.
- Once you feel that the mixture will hold its shape when made into balls, turn off the heat.
- Let the paste cool a little.
- Take about 1 heaped tablespoon of the mixture and roll into a ball.
- Do this for the rest. Keep the balls aside on a plate. Refrigerate them while you make the mochi wrappers.
- You may also freeze the red bean balls for later use.
For the mochi wrappers:
- I recommend using a non-stick saucepan.
- Place the mochiko, coconut milk, water, maple syrup or other sweetener and vanilla in a pot.
- Mix well and then turn the heat on to low-medium.
- Constantly stir (preferably with a silicon spatula) and continue cooking.
- Once the mixture thickens into a big blob of dough, keep on cooking while turning the dough in the pan for about 8 - 10 more minutes.
- Turn off the heat.
Make the mochi balls:
- You will need to work quickly with the dough while it is still warm as it will be more malleable and easier to shape.
- Place about 2 - 3 tablespoons of cornstarch onto the work surface or small plate.
- Place a heaped tablespoon of the mochi mixture onto the cornstarch.
- Dip your fingers in some cornstarch and flatten the mochi into a circular disc.
- Place one ball of red bean filling in the centre.
- Pinch the mochi dough and wrap it all around the filling to completely enclose it.
- Roll the mochi lightly between your palms to even out the mochi wrapper all around.
- Place the mochi on a plate floured with some cornstarch.
- Make the rest of the mochi until all the wrapper is used up.
- Place in an airtight container and refrigerate for up to 5 days.
- Enjoy them cold or at room temperature.
Notes
*Ready-made sweet red bean paste filling is available at most Asian grocery stores (in the refrigerated or freezer section). It's also available online. You may want to use this if you want to save time.
**Substitute with 1/3+ teaspoon stevia powder for sugar-free option.
***If you don't have maple syrup, you may substitute with a simple sugar syrup or 3 tablespoons sugar + 2 tablespoons water.
To make it sugar free, use less than 1/4 teaspoon stevia powder + 2 tablespoons water
Find these ingredients online:
Adzuki beans - https://amzn.to/37WLJRp
Mochiko (glutinous rice flour) - https://amzn.to/3tIuzQ5
****the Koda Farms brand is the best that I've used so far, taste-wise and texture-wise
Stevia powder - https://amzn.to/36GLUzs
Recipe by Teenuja Dahari - Veganlovlie - https://veganlovlie.com/red-bean-mochi-recipe
Nutrition Information:
Yield:
12Amount Per Serving: Unsaturated Fat: 0g

Holy cow! Before I was vegan I used to LOVE eating mochi ice cream. I would sneak it from the freezer of the Japanese restaurant I used to work at. The green tea flavor was my favorite, although we didn’t even have a red bean one.
Anyway – I had almost forgotten all about it until I saw this.
Definitely going to make this recipe for the next family gathering.
Great job.
I have been wanting to try this for a while they are my sons favourite.Recipe and instructions easy to follow:) Have tried a lot of your cake recipes the apple one is our family favourite. Only been Vegan a year but have been trying for longer, its getting easier,thanks to vegan lovlie you take the worry away wondering what to cook.Love your sweet potatoe wraps too.Thank you for the inspiration
Aw, thank you for your sweet comment Senga. It’s lovely to hear that you are enjoying the recipes. Blessings to you and your family. 🙂
Sooo good! I love that it’s not too sweet 🙂
Thank you Victoria. 🙂