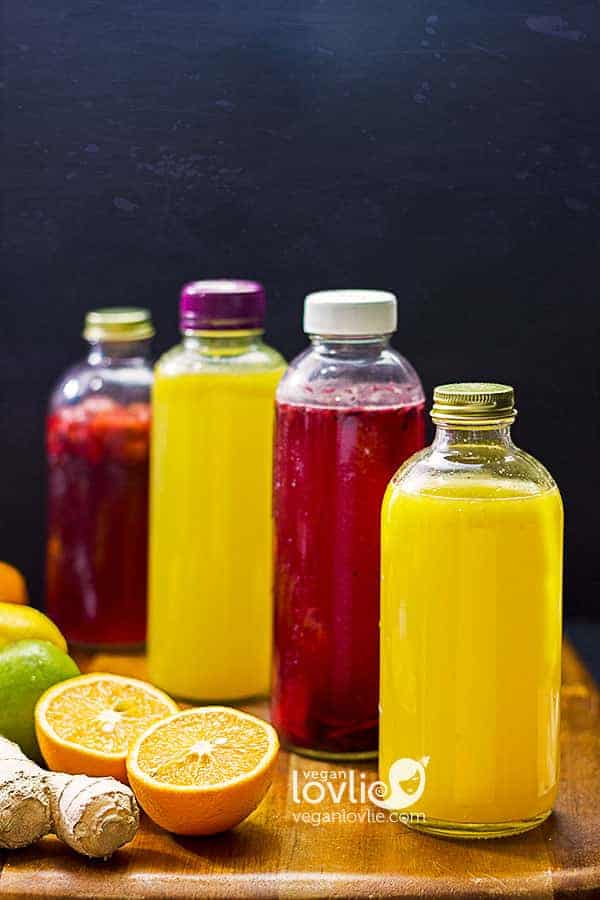
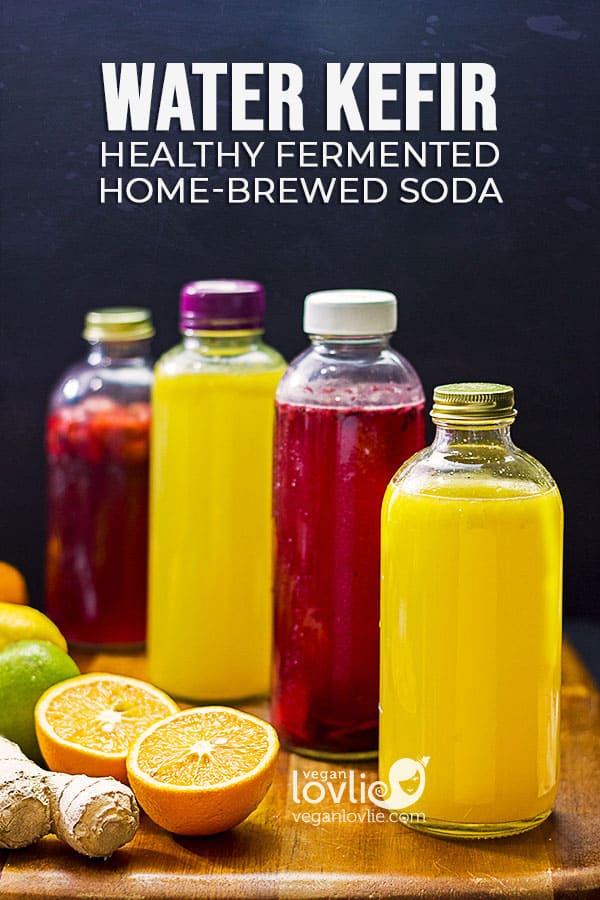
Water kefir is a fermented probiotic beverage full of beneficial bacteria and is so simple, easy and fun to prepare at home. It is slightly tangy and has a pleasant taste, quite similar in flavour to a slightly fizzy lemonade. It’s a healthy low-sugar alternative to commercial sodas which can even be enjoyed by small children.
If you’ve ever made kombucha at home, then you’ll find water kefir so much simpler to make. Once you get the hang of it, the simple process becomes a breeze and soon you’ll have an endless supply of healthy tasty probiotic drink to enjoy everyday while cultivating a healthy gut flora.
What is Water Kefir?
Water kefir is made by first introducing a SCOBY (symbiotic culture of bacteria and yeasts), which in this case are ‘water kefir grains’ into sugar water. Water kefir grains are not actual grains like wheat, rye or rice but they are referred to as such only for their appearance. They in fact look like little clusters of translucent crystal-like gelatinous structures.
When properly cared for and regularly cultured, water kefir grains will grow and multiply indefinitely and continue to produce great tasting probiotic drinks.
Water Kefir Benefits
The beneficial bacteria and yeasts present in the water kefir grains consumes the sugar and turn it into beneficial acids, B vitamins as well as food enzymes. This process of fermentation reduces the sugar content of the drink while creating carbonation, resulting in a low-sugar fizzy drink that not only tastes great but is loaded with probiotics. The longer you leave the grain to ferment, the less sugar the drink will contain. However, if left for a prolonged period of time without sugar, the water kefir grains will starve and eventually die.
Alcohol Content in Water Kefir
A small amount of alcohol is produced during the fermentation process of the water kefir. The alcohol content is around 0.5% to 0.75% depending on how long the water kefir is fermented. This alcohol content is quite negligible compared to what you would typically find in over-ripe fruit which is at around 1% or slightly less. You may sometimes feel that there is more alcohol in water kefir but what you might be tasting is the yeast which is reminiscent of beer. If you are really concerned about this, you may want to read this post about the alcohol content in water kefir.
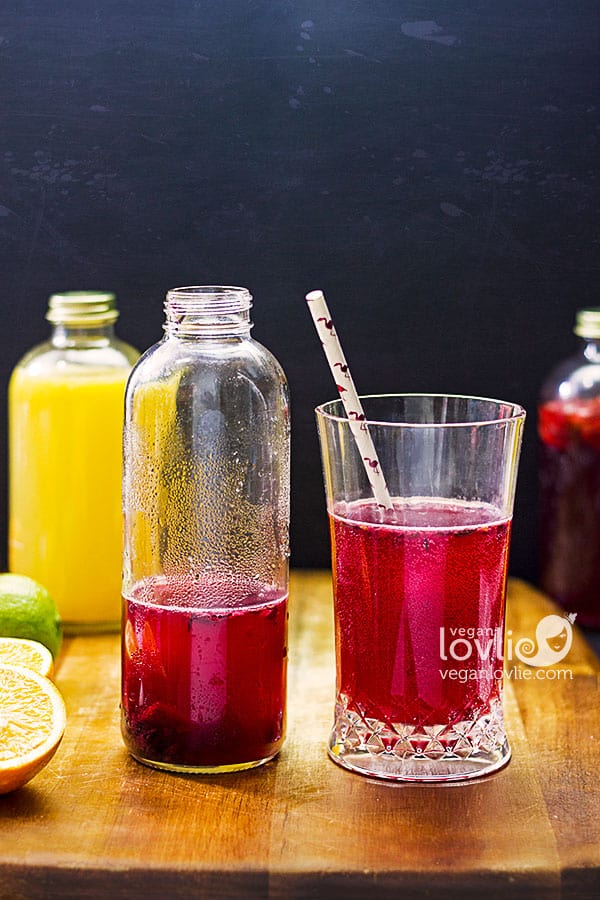
Water Kefir Soda Brewing Procedure
What You Need to Make Water Kefir
Where to Buy Water Kefir Grains?
I bought my water kefir grains from GoGo Kefir in Canada. I opted for the live water kefir grains, since I was going to use them straightaway and I’ve found their grains to be excellent.
Disclosure: This is not a sponsored post or affiliate link, we just loved the quality of the product from GoGoKefir and the customer service, hence our recommendation.
Only the Amazon links are affiliates where we receive a few cents for each purchase you make at no extra cost to you. This helps to maintain this blog and keep the information free for everyone to access. Thank you. 🙂
I initially bought just one tablespoon of water kefir grains. If this is what you are getting, you’ll need to halve the recipe below. With time and under the right conditions, the kefir grains will multiply indefinitely.
You can order water kefir online in various stores on Ebay, Amazon US and Amazon Canada. You can also find them in certain health stores. Just make sure to buy from a reputable source so that you don’t run the risk of getting contaminated grains.
Once you’ve acquired your water kefir grains, follow the instructions on the package to rejuvenate or re-hydrate the grains depending on whether you bought live grains or dehydrated ones.
After you’ve rejuvenated/rehydrated your water kefir grains, you’re ready to start the two-stage fermentation process as described below.
Water
Tap & Well Water
Fresh and clean water should be used when fermenting water kefir. You may use tap water as long as the chlorine is removed from the water first; chlorine is likely to kill the kefir grains.
To remove chlorine from water, boil the water in a kettle or pot first to evaporate the chlorine and then let it sit overnight before using. Avoid using a microwave to boil the water.
You can also use clean, well water if the iron content is not too high.
Filtered Water and Minerals
There are a few things to pay attention to if you are planning to use filtered water. While water Kefir grains do not do well in distilled, reverse osmosis or filtered (Zero, Brita, Pur, etc) water due to the lack of minerals, if you add the minerals back to the water after filtration, this may be okay.
For distilled, reverse osmosis or filtered water add a couple drops of trace mineral supplement (available at natural food stores) or a pinch of Celtic grey sea salt. You may use bottled water but choose spring water that has not been ozonized (check the label on the bottle). Try to experiment and see what works best for you.
I use a Berkey Gravity Water Filtering System with Fluoride Filter attachments (which you can find on Amazon US and Canada). I keep some alkalizing mineral stones (from Amazon US or Canada) in the bottom compartment where the filtered water sits and this re-introduces the minerals into the water after the chlorine and fluoride have been removed. This works well for me and provides an alkaline mineral-rich water to grow the kefir grains. There is no need to boil the water if you are using a filtration system that replenishes the water with minerals.
Sugar
I use organic blond cane sugar to grow the grains; this produces healthy grains and excellent tasting Water Kefir. I also add a little rapadura (I use this one in Canada) or Sucanat sugar which adds some extra minerals to the water. The grains love the molasses in these sugars.
Bleached white table sugar or honey are not suitable for growing water kefir grains, nor are they good for the second fermentation stage either. Other sugars that you may use in small quantities are jaggery and coconut sugar. Just don’t add too much as the mineral content will be too high for the grains. Blond sugar should be the main sugar with a little of the other mineral-rich sugars.
Equipment / Utensils
To avoid contamination, always use very clean equipment. Plastic and glass is preferred. I also use a wooden spoon for stirring. Avoid metal equipment and utensils although some sources claim that stainless steel might be okay. I have used stainless steel spoons on some occasions without any issues but it is best to steer clear of any metals as many have the property of killing bacteria and may affect the kefir grains.
You’ll need:
- Measuring cups – plastic or glass
- Measuring spoons – plastic or glass
- Large wooden or plastic spoon
- Large glass pitcher or measuring jug
- Fine mesh plastic strainer – I use a 12 cm (4”) strainer – you may need larger strainers as the grains start to grown and you are keeping them in just one large jar.
- One 710 ml-(24-oz)-glass jar to get started. Other sizes or more as required as you increase production.
- Bottles (swing top or regular screw top ones) and/or jars with tight sealing lid as required. Bottles can be clear or brown. I just up-cycle the screw top bottles that I have lying around and they work fine.
- Jars for storing extra grains
- Cloth and rubber bands for lids – I use a piece of muslin or cheese cloth. You may also use a coffee filter. This lets the cultures breathe and keeps everything else out.
- Plastic funnels, optional
This should get you started and you may need other equipment / utensils as you go.
Watch the video for the step-by-step process
Basic Water Kefir Recipe
Home-brewed Flavoured Soda Using Two Stage Fermentation
Fermentation Stage 1 (*see recipe notes)
One 24-oz [710 ml] mason jar
2 tablespoons water kefir grains
2 tablespoons organic sugar
1/2 tablespoon (or slightly less) rapadura (or sucanat sugar, coconut sugar or jaggery)
2 cups of lukewarm water 24-26°C (75-80°F) or at room temperature
Recipe notes:
*For Fermentation Stage 1 you can use any multiple of this formula depending on the quantity of Kefir Grains. If you are buying 1 tablespoon of water kefir grains to start with, then halve the recipe.
In the video, I am using 4 tablespoons of Kefir Grains, 4 cups of water and 4 tablespoons of organic cane sugar + 1 tablespoon of rapadura or sucanat sugar
Procedure – Fermentation Stage 1
- In a jar, mix the sugar and water and stir until the sugar is completely dissolved.
- Add the water kefir grains.
- Cover the jar with a cloth secured with a rubber band and let sit in a warm place 24-26°C (75-80°F) for 48 hours.
During summer, I leave the jars in a closed cupboard. Light does not affect the grains, so if you decide to leave the jar on the counter, it’s okay too.
In winter, you may place the jar on top of your fridge. It is usually a nice warm spot to ferment your grains.
If fermentation conditions are too cold your grains will grow slowly or not at all. - After 48 hours pour the mixture through a strainer and set the grains aside for your next batch.
- Taste the mixture using a clean spoon or straw. If using a straw, dip it in about ½ way and place your thumb over the end and then pull it out. The mixture will taste less sweet than the initial sugar water solution. If you like your water kefir a little on the sweet side, you can proceed to Stage 2. If you want less sugar, cover and let it sit an additional 18 – 24 hours before proceeding to Stage 2.
Fermentation Stage 2 & Flavouring
Here are 3 flavour ideas to get you started. Experiment on your own and try different flavours. I also enjoy water kefir without any additional juice or other flavours and I even add it to smoothies or protein shakes, so this is where you can have fun experimenting.
Flavour 1: Fresh & Dried Fruits
1/4 cup fresh fruits (fresh or frozen, e.g. cherries, berries, watermelon…)
Flavour 2: Fruit Juices
1/4 cup [60 ml] fruit juice of choice (I love freshly squeezed orange juice but store-bought organic juice like apple, pomegranate… are great options too and make flavourful soda.)
Flavour 3: Herbal Tea & Ginger
1 teaspoon dried hibiscus flowers
About 1-inch cube fresh ginger root (finely sliced)
1 tablespoon (or a little less) maple syrup
Other flavour ideas: just plain ginger root, fragrant herbal teas (lemongrass, chamomile, lavender…), other fresh fruit juices (apple, grape, pomegranate…), dried unsulfured fruits (figs, raisins, pineapple…), vanilla…
Procedure – Fermentation Stage 2 & Flavouring
Fresh & Dried Fruits
You may use any fresh fruits that are in season. Dried fruits like pineapple, raisins and dates are great too.
Just pit (if required) and chop the fruits into small pieces (halves or quarters in the case of cherries/strawberries). Drop them into the bottles and fill with 2 cups of water kefir. Don’t overfill (leave a little space at the top).
I’m using cherries in the video as I filmed it when cherries were in season.
Fruit Juices
Add 60 ml (4 tablespoons) of juice to 2 cups of water kefir in a bottle. You may adjust to your taste but try to use a little juice as possible to just get the flavour without diluting the water kefir content too much.
Don’t fill the bottles right to the top, leave a little space for the carbonation.
Herbal Tea: Hibiscus, Ginger & Maple Syrup Flavour
Place the dried hibiscus flowers and ginger slices in the bottle. Stir a little less than one tablespoon of maple syrup** into 2 cups of water kefir then fill the bottle. Again, don’t overfill.
**We’re adding a little sweetener here to help with the carbonation. Without the sweetener, no carbonation will happen. In the case of fruits, they already contain their natural sugars so there is no need to add any more unless you like the soda to be a little sweeter.
Seal the bottles with tight fitting lids and let sit in a warm place for 24 – 48 hours.
Test after 48 hours by slowly opening the lid on the bottle. Be very careful. There is probably a lot of carbonation inside and the liquid may fizz up and make quite a mess if you open the bottle too quickly.
If your water kefir is ready it will fizz up. You can now place the bottles in refrigerator to stop the fermentation process.
If the kefir has little or no fizz, add ½ teaspoon of sugar or if you have room add more juice and then wait another 24 hours.
Note: If you don’t want the fizz (carbonation), refrigerate your kefir as soon as you bottle it.
I hope you’ll have fun making your first batch of water kefir. After your first batch, just start the process all over again using the basic recipe above (Stage 1 & 2).
Troubleshooting Water Kefir Fermentation
If your grains seem to be a bit sluggish and not growing it is usually one of these:
- Water – Try using non-ozonized spring water.
- Temperature – Make sure the temperature is kept at 24 – 26 C. It might help to stick an adhesive thermometer strip on your fermentation jar to monitor the temperature.
- Mineral content – Try adding a couple drops of mineral supplement, add a pinch of grey sea salt or an extra teaspoon of rapadura/Sucanat sugar.
If your grains are getting mushy or disintegrating:
- Mineral content – There may be too much minerals in the water. Try rinsing the grains with filtered water then do the first stage fermentation with just the blond sugar for one to two cycles (don’t add the rapadura or sucanat). See if this helps, then go back to fermenting normally with a little rapadura or sucanat.
- Grains are tired – Put the grains to rest for a little while.
Mix 1 cup of water with 1 tablespoon blond sugar. Place the grain in this sugar water in a jar. Cover with a cloth and elastic band and place in the refrigerator for 1 week. The cold will put the grains to sleep and allow them to rest/rejuvenate. After one week, restart the fermentation process as usual.
What to do with the extra grains?
As you progress you’ll eventually have extra grains. You can give them away to family and friends so they can start making their own water kefir. If you have no one to give them away to, store them in a 500 ml jar with sugar water (1 cup of water with ½ tablespoon of sugar). Cover with a piece of cloth and seal with a rubber band. You may store the extra grains beside your next batch of water kefir but I like to keep them in the refrigerator (which preserves them for longer without having to change the sugar/water too quickly). Rotate the extra grains in and out of fermentation to keep them healthy. If you are not rotating the grains and you are keeping them at room temperature, change the sugar/water mixture every 48 hours.
You can also dry and freeze extra grains, use them in smoothies & recipes. If you are adding them to smoothies or recipes, start with a little at a time as the concentration of the microorganisms in the grains is much higher than in the fermented water. If your gut is not able to handle such a high concentration of probiotic all at once, you may get the runs!
Basic Water Kefir Recipe
Ingredients
Fermentation Stage 1 (*see recipe notes)
One 24-oz [710 ml] mason jar
- 2 tablespoons water kefir grains
- 2 tablespoons organic blond sugar
- 1/2 tablespoon (or slightly less) rapadura, or sucanat sugar, coconut sugar or jaggery
- 2 cups lukewarm water, [24-26°C / 75-80°F], or at room temperature
Fermentation Stage 2 & Flavouring
Flavour 1: Fresh & Dried Fruits
- 1/4 cup fresh fruits, fresh or frozen, e.g. cherries, berries, watermelon...
Flavour 2: Fruit Juices
- 60 ml fruit juice of choice, [1/4 cup], freshly squeezed orange juice or store-bought organic juice like apple, pomegranate. grape juice...
Flavour 3: Herbal Tea & Ginger
- 1 teaspoon dried hibiscus flowers
- 1 inch cube fresh ginger root, finely sliced
- 1 tablespoon (or a little less) maple syrup, (or blond sugar)
Other flavour ideas: just plain ginger root, fragrant herbal teas (lemongrass, chamomile, lavender...), other fresh fruit juices (apple, grape, pomegranate...), unsulfured dried fruits (figs, raisins, pineapple...), vanilla...
Instructions
Procedure - Fermentation Stage 1
- In a jar, mix the sugar and water and stir until the sugar is completely dissolved.
- Add the water kefir grains.
- Cover the jar with a cloth secured with a rubber band and let sit in a warm place 24-26°C (75-80°F) for 48 hours.During summer, I leave the jars in a closed cupboard. Light does not affect the grains, so if you decide to leave the jar on the counter, it's okay too.In winter, you may place the jar on top of your fridge. It is usually a nice warm spot to ferment your grains.If fermentation conditions are too cold your grains will grow slowly or not at all.
- After 48 hours pour the mixture through a strainer and set the grains aside for your next batch.
- Taste the mixture using a clean spoon or straw. If using a straw, dip it in about ½ way and place your thumb over the end and then pull it out. The mixture will taste less sweet than the initial sugar water solution. If you like your water kefir a little on the sweet side, you can proceed to Stage 2. If you want less sugar, cover and let it sit an additional 18 - 24 hours before proceeding to Stage 2.
Fermentation Stage 2 & Flavouring
- Here are 3 flavour ideas to get you started. Experiment on your own and try different flavours. I also enjoy water kefir without any additional juice or other flavours and I even add it to smoothies or protein shakes, so this is where you can have fun experimenting.
Fresh & Dried Fruits
- You may use any fresh fruits that are in season. Dried fruits like pineapple, raisins and dates are great too.
- Just pit (if required) and chop the fruits into small pieces (halves or quarters in the case of cherries/strawberries). Drop them into the bottles and fill with 2 cups of water kefir. Don't overfill (leave a little space at the top). I'm using cherries in the video as I filmed it when cherries were in season.
Fruit Juices
- Add 60 ml (4 tablespoons) of juice to 2 cups of water kefir in a bottle. You may adjust to your taste but try to use a little juice as possible to just get the flavour without diluting the water kefir content too much.
- Don't fill the bottles right to the top, leave a little space for the carbonation.
Herbal Tea: Hibiscus, Ginger & Maple Syrup
- Place the dried hibiscus flowers and ginger slices in the bottle.
- Stir a little less than one tablespoon of maple syrup** into 2 cups of water kefir then fill the bottle. Again, don't overfill.**We're adding a little sweetener here to help with the carbonation. Without the sweetener, no carbonation will happen. In the case of fruits, they already contain their natural sugars so there is no need to add any more unless you like the soda to be a little sweeter.
- Seal the bottles with tight fitting lids and let sit in a warm place for 24 - 48 hours.
- Test after 48 hours by slowly opening the lid on the bottle. Be very careful. There is probably a lot of carbonation inside and the liquid may fizz up and make quite a mess if you open the bottle too quickly.
- If your water kefir is ready it will fizz up. You can now place the bottles in refrigerator to stop the fermentation process.
- If the kefir has little or no fizz, add ½ teaspoon of sugar or if you have room add more juice and then wait another 24 hours.
- Note: If you don’t want the fizz (carbonation), refrigerate your kefir as soon as you bottle it.
- I hope you'll have fun making your first batch of water kefir. After your first batch, just start the process all over again using the basic recipe above (Stage 1 & 2).
Video
Notes
Where to Buy Water Kefir Grains?
US - Amazon US Canada - Amazon Canada and GoGoKefir Also on Ebay and in health stores.Troubleshooting Water Kefir Fermentation
If your grains seem to be a bit sluggish and not growing it is usually one of these:- Water - Try using non-ozonized spring water.
- Temperature – Make sure the temperature is kept at 24 - 26 C. It might help to stick an adhesive thermometer strip on your fermentation jar to monitor the temperature.
- Mineral content – Try adding a couple drops of mineral supplement, add a pinch of grey sea salt or an extra teaspoon of rapadura/Sucanat sugar.
- Mineral content - There may be too much minerals in the water. Try rinsing the grains with filtered water then do the first stage fermentation with just the blond sugar for one to two cycles (don't add the rapadura or sucanat). See if this helps, then go back to fermenting normally with a little rapadura or sucanat.
- Grains are tired - Put the grains to rest for a little while.
Mix 1 cup of water with 1 tablespoon blond sugar. Place the grain in this sugar water in a jar. Cover with a cloth and elastic band and place in the refrigerator for 1 week. The cold will put the grains to sleep and allow them to rest/rejuvenate. After one week, restart the fermentation process as usual.
What flavours are you experimenting with? Leave us a comment and let us know or take a picture and tag us @veganlovlie #veganlovlie on Instagram.
Save this recipe for later. And while you’re on Pinterest, please follow us and come pin along with us.

Just ordered some water kefir grains. Thank you! LOVE your site and recipes!
You’re very welcome. 🙂
I have a Berkey water system as well – I’m wondering where you got your remineralizing stones?
They are the Santevia mineral stones. I bought them on Amazon in Canada here – https://amzn.to/2XwhJnI. If you are in the US, they are these ones – https://amzn.to/3dxDDwz. I just place them in the bottom compartment, then take them out every month or so and boil them for a few minutes, then put them back in.