Overnight spelt bread is quite a common occurrence at our place, since dough that is left to ferment all night doesn’t require a whole lot of kneading.

At some point, I was making this bread at least once or twice a week. It’s so much nicer than store-bought bread with a short list of ingredients. The process is also easy and doesn’t require a lot of kneading, just a few folds to shape the dough.
Sometimes I use 100% sifted spelt flour, but I find that the bread rises better and is fluffier when I use 1 part all-purpose flour to 2 parts sifted or whole spelt flour. Equal parts will also yield good results with some adjustments to the amount of water used.
I’ve given sourdough starter a try a couple of times. And, although I did get satisfactory bread results, my tummy just can’t handle sourdough very well. I find this quite strange, since sourdough is meant to be better than actual yeast. Nevertheless, it doesn’t agree with me very well. Hence, this overnight spelt bread, using traditional yeast, is a good option and much more agreeable in my case.
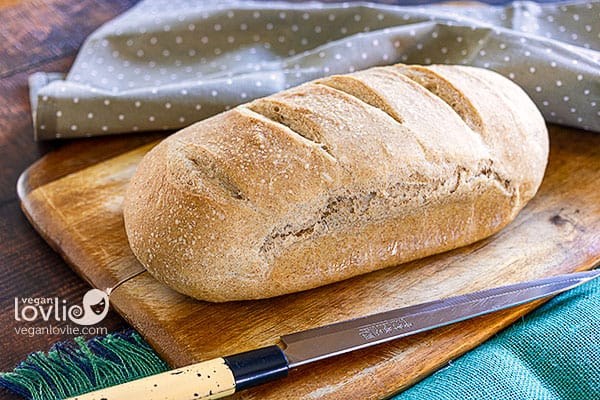
Even though the dough ferments all night, this doesn’t quite create a sour taste. It mostly allows the yeast and gluten to develop gradually without the need for a lot of kneading.
This bread can be baked in a loaf pan or heavy pot, if you intend to use it to make sandwiches. I prefer a rather loose kind of shape. So, I usually place the dough on a baking tray with two glass bottles on either side to help it keep its shape upright. This creates a somewhat large French bread style.
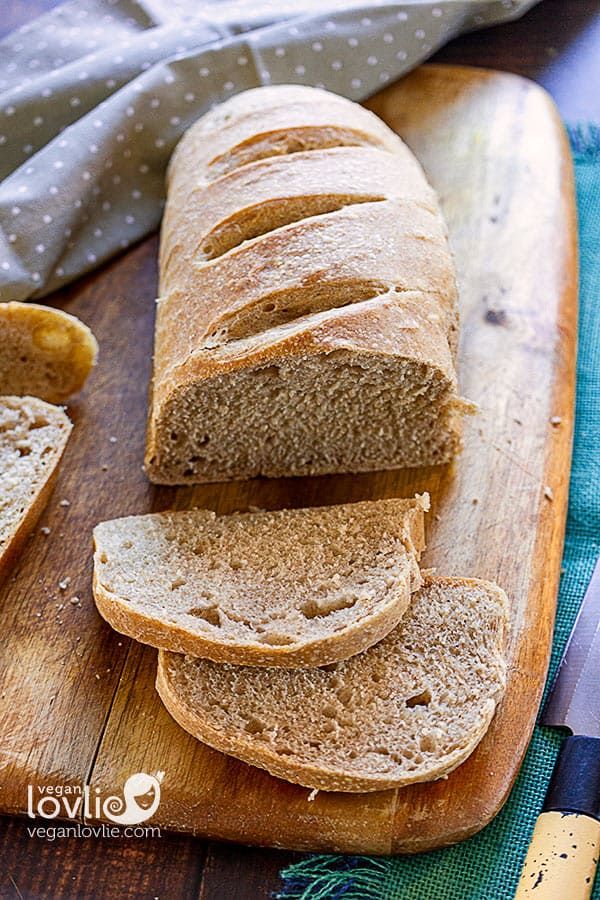

No-knead Overnight Spelt Bread

Overnight spelt bread doesn't require a lot of kneading as the dough is left to ferment all night and this lets the gluten and yeast develop gradually. This bread is great to use as sandwiches or accompaniment to any meal.
Ingredients
- 320 g (2 cups) sifted or whole spelt flour
- 160 g (1 cup) all-purpose flour (or use white spelt flour for wheat free)
- 1 teaspoon traditional or active dry yeast
- 2 teaspoons maple syrup or 1 teaspoon sugar
- 60 ml (¼ cup) warm water
- 1¼ teaspoon salt
- 240 ml (1 cup) warm water, more as required to make a soft dough
- 2-3 tablespoons olive oil
Instructions
In a large bowl, mix the maple syrup with 60 ml warm water, then sprinkle the yeast on top. Let the yeast proof until it’s frothy.
Next, add in the rest of the water, both flours and salt. Mix with your hand until dough forms. Add more water as required to form a soft dough. Add a tablespoon of olive and fold the dough a couple of times to incorporate the oil. Form the dough into a smooth ball.
Drizzle the mixing bowl with some oil and place the dough back into the bowl.
Cover with a plate/lid or tea towel and set on the counter to rest for 12-16 hours.
Once the dough has rested, it should have risen significantly and be quite bubbly. It will be soft.
Use a spatula or your hands to stretch and fold the dough a few times in the bowl before placing onto a large square of parchment paper. Sprinkle a little flour over it and shape into a thick log. Lift and place the parchment paper on a baking tray. Place the whole tray in a large plastic bag. Place 2 glass bottles on either side of the bread (to help stay upright instead of spreading out).
Pinch and tie the end of the plastic bag, making sure the plastic is not touching the dough. Try to inflate the plastic bag around the tray like a balloon.
Let the dough rise for another 30-60 minutes or until doubled in size. Then take the tray out of the plastic bag.
Score the top across with a sharp knife or razor blade to make some deep dents.
About 10 minutes before baking, preheat the oven at 230C / 450F, with a bowl of water on the bottom rack.
Reduce the oven heat to 200C / 400F and place the baking tray on the middle rack and bake the bread, for about 40 - 45 minutes, or until the crust is golden. If it’s baked through, the bread should sound hollow when tapped.
Let the bread cool completely on a wire rack before cutting. Slicing it while it's still hot will result in an unpleasant gummy texture. Store in a sealed container either at room temperature or refrigerated for 3-5 days.
You might also like these other bread recipes:
Sweet Potato Bread
Spelt English Muffin (cooked in a pan, no oven required)
Pear Rolls
Do you have a picture you could share of the loaf on the parchment with the bottles around it wrapped in plastic? I *think* I get it, but I’d like to make sure. This bread look amazing! I’ve been bread baking for 50 years and I can’t wait to try this one! Thank you!
Hi Suzy, I’ll try to make this bread again soon. And then, I’ll update the post with a picture of the process and arrangement of the bottles. I was meant to do this but I forgot to take a picture the last time I made this bread. Please bear with me, I’ll try to make this bread soon enough.
Hi! Can I use cling wrap to cover it or will that not let in some of the wold yeasts from the air? I’m just worried about a hard outer crust forming overnight
Hi Nicole,
Cling wrap is fine to use. Sorry about my late response.
Hope the bread turns out good for you.
I made this bread – started last night – left overnight etc. It has worked absolutely fantastic and it will be my ‘go to’ recipe now . A couple of things – it didn’t rise after 1 HR during the second proving and I didn’t use the weighted bottles idea – I didn’t have any and I didn’t have a good plastic bag ( as I have reduced plastic here). I used a normal loaf Tim and covered it for the hour . It still rose ok in the oven and is a delicious loaf
Hi, nice recipe, thank you 😉
My home smells amazing, but the bread itself did not rise well… Also I must have overbaked it as it’s very hard outside.
Ps. I used aroud 300g whole wheat flour and the rest – spelt flour.
Any tips?