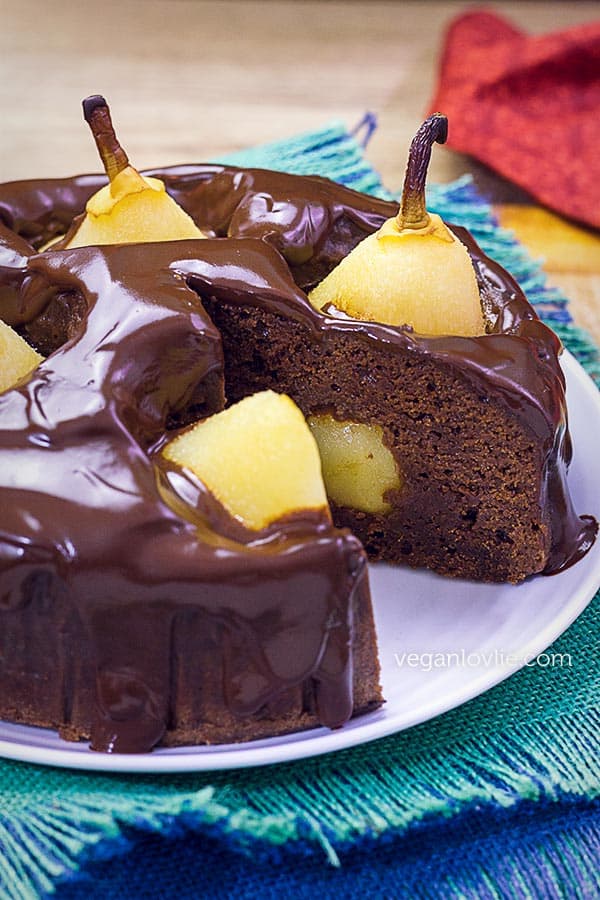
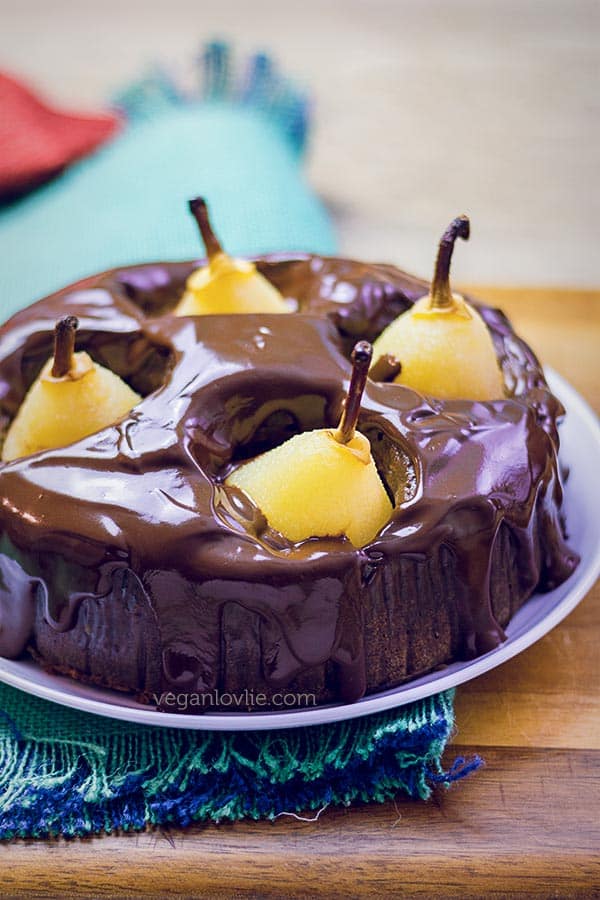
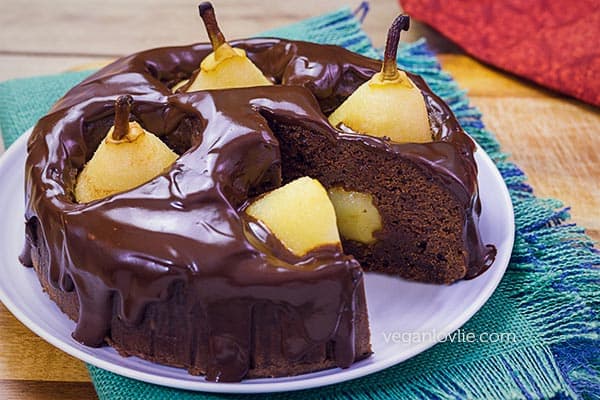
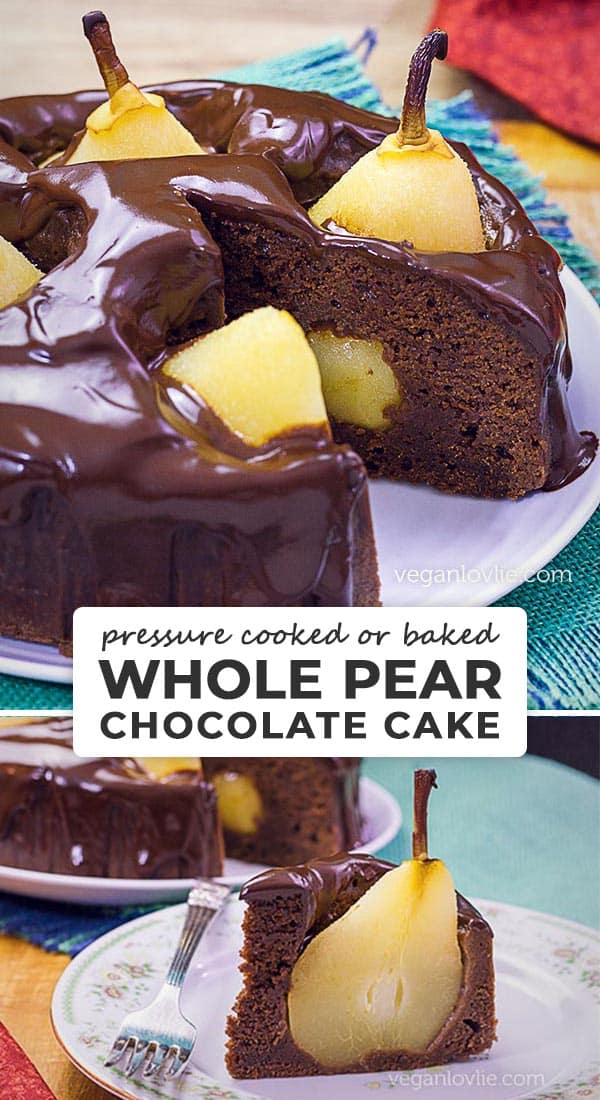
Chocolate and pear lovers should find much joy in this cake — whole sweet juicy California Bartlett pears cushioned inside deliciously moist and mellow chocolate cake with a beautiful chocolate ganache glaze. This cake is quite simply … marvellous! Every bite is delightful.
This Whole Pear Chocolate Cake is steamed in a pressure cooker and is an ideal cake for the summer months. [Recipe features electric / stovetop pressure cooker and baking options].
This post is sponsored by California Bartlett pears. For full disclosure, please read below at the end of the post.
California Bartlett pears are the ideal variety of pear for this cake. When ripe, Bartletts are among the sweetest and juiciest of all pears which is why I love them so much for dessert recipes. They are available for several weeks in July and August in Canada.
When it comes to eating them raw as a healthy snack, pears are often underlooked compared to apples or bananas. For my part, I much prefer raw pears to apples or bananas which seem to be among the most popular snack or lunch box fruits. In fact, I don’t really buy apples if I am not baking with them. But pears are a different story.
They are my go-to fruit snack at any time of the day. I just love their ambrosial fragrance and texture. If I am eating them raw, I love them semi-ripe. On the nutrient profile, they contain antioxidants, and are a good source of fibre, and a source of Vitamin C, potassium and folic acid.
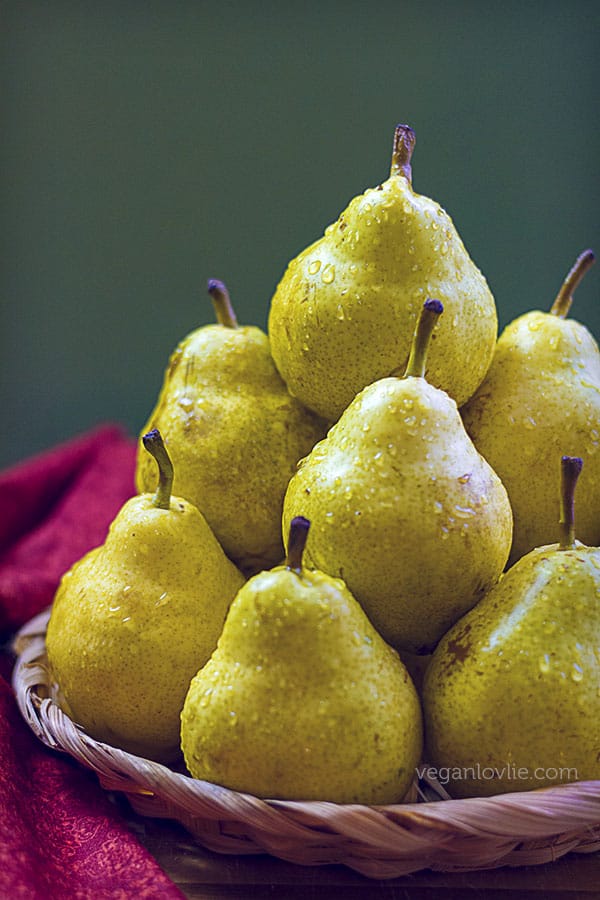
When they start becoming too ripe to eat, they go into all sorts of delicious desserts like this Pear Custard Pie or this Pear Coconut Creme Caramel Custard. And in today’s Pear Chocolate Cake that can be made in a pressure cooker during the hot summer months. I’ve become quite a fan of this cake.
How to select California pears
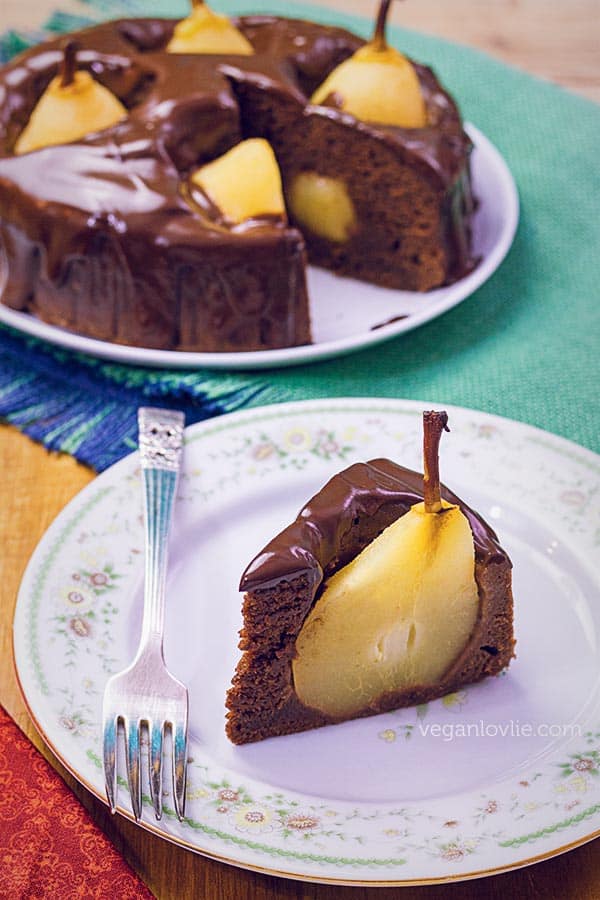
Look for firm, well-shaped fruit. You may wish to buy a mix of green pears to ripen at home if you want to eat some. I personally prefer semi-ripe pears for eating. When the pears are at their peak ripeness, they are golden yellow and can be enjoyed immediately or are ideal for cooking and baking. For this particular recipe, I suggest using slightly smaller pears so that you can fit them nicely into the cake pan and get half a pear in each slice.
Ripening and storage
Pears can be ripened at home in a bowl at room temperature. When California Bartletts are green and firm, they will take four to six days to ripen on their own.
When a Bartlett is golden yellow, it is fully ripe and at its juiciest, most flavourful stage. This is the ideal stage for this recipe.
Because pears ripen on the outside last, by the time the outside is soft it’s overripe. So, to test for ripeness, put gentle pressure on the top of the pear near the stem. If it gives way a little, then it’s ripe. Minor blemishes do not affect the flavour or quality of the pear.
Since these pears can spoil easily, you may want to refrigerate them to preserve or slow down their ripening process.
Refrigeration will hold their ripeness for another 3-5 days, just in case you don’t have time to make this cake when you had planned to.
Preparation tips
Once cut, peeled or sliced, pears will start to brown. To prevent this from happening, I usually just rub them with a slice of lemon. You may also dip them into a mixture of 1 tablespoon (15 mL) lemon juice and 1 cup (240 mL) water.
To remove the skin, hold the pear firmly in one hand and using a sharp paring knife, carefully remove the outer layer of skin as thinly as possible. I like to use a vegetable peeler but the blade needs to be very sharp, otherwise it will just crush the pear especially if it is very ripe.
Bartlett pears have such a tender skin that it is not even necessary to remove it for baking. However in this recipe, I do find that peeling the pears result in a much nicer texture inside the cake.
Prepare the spring-form cake pan for the pressure cooker
The video below shows best how to prepare the cake pan for this recipe.
Line the bottom and side of the pan with parchment paper. For the side, leave a slightly taller collar around. This is to create more height in case the cake rises more. If your mould is quite tall, then the extra height is not necessary.
Make a ‘lid’ with parchment paper or aluminium foil to cover the pan so that the steam does not drip back on the cake and make it soggy.. Note: if you are baking this cake, you don’t need the lid.
If you are using aluminium foil, just cover the pan and press the foil around so that no steam can get in.
If using parchment paper, you need to shape it so that it wraps tightly around the pan.
To do this, trace around the pan on some parchment paper.
Then extend the circle diameter by about 6 – 8 cm. Cut around this larger circle.
Snip into the circle from the edge towards the centre and stopping at the inner circle at regular intervals all around.
Fold the snipped pieces of paper along the inner circle (size of pan).
Staple each of the folded pieces together at the bottom to make a straight edge around the circle and the lid is done.
We will also need 2 pieces of string, each about 4 times the width of the pan. This will be tied around the pan and serve as a handle which will make it easy to lower the pan in the pressure cooker and then later remove it.
Watch the video for the step-by-step process
Pear Chocolate Cake in a Pressure Cooker
Ingredients (8 slices)
4 ripe California Bartlett pears, peeled and bottom part removed
For the cake:
Dry –
1 1/4 cups [150 g] whole spelt flour (substitute with wholewheat or all-purpose/plain flour)
5 tablespoons [30 g] cocoa powder
1 tablespoon [12 g] cornstarch
1 1/2 teaspoons baking powder
1/8 teaspoon baking soda
1/8 teaspoon salt
1/2 teaspoon cinnamon powder
Wet –
1 cup + 1 tablespoon [255 mL] soy milk (almond, cashew or coconut milk is also good)
1 tablespoon rice vinegar (apple cider vinegar or lemon juice is also good)
1 teaspoon vanilla extract
2/3 cup [135 g] granular sugar (like demerara, turbinado or blond sugar)
1/4 cup [60 mL] melted coconut oil (sunflower or olive oil is also good)
Chocolate ganache glaze –
50 – 100 g* [1.7 – 3.5 oz] dark chocolate
1/4 cup – 1/2 cup [60 – 120 mL] non-dairy milk (I used soy milk)
For the pressure cooker** –
2 cups water
Bakeware and materials
18 cm / 7-inch spring-form cake pan
For smaller pressure cookers, use a 15 cm / 6-inch spring-form cake pan. (Measure the diameter of your pressure cooker to be sure).
Parchment paper /aluminium foil (if using)
Cotton twine or other piece of strong string – 2 pieces, each 4 times the width of the pan. This will help to create a handle.
Steamer rack
Notes:
*If you wish to cover the whole cake with chocolate, use 100 g. For a light drizzle, 50 g should be enough. Adjust the amount of milk required accordingly.
**If you have a stovetop pressure cooker, add 1 more cup of water. For steamer pot, keep adding water as required.
Directions
Prepare the cake pan, parchment paper ‘lid’ and string according to the instructions above. (Watch the video for visual instructions).
If you are baking the cake, preheat the oven at 180C / 350F.
Prepare the pears –
Peel the pears and remove the bottom part.
Rub them with a slice of lemon to prevent browning.
For the cake –
In a measuring jug, place the milk and vinegar. Leave the mixture to stand for a few minutes.
Meanwhile, in a large mixing bowl, mix all the dry ingredients together.
In the measuring jug, add the rest of the wet ingredients and stir well.
Make a well in the centre of the dry ingredients and pour the wet ingredients.
Mix to incorporate all the ingredients into a smooth batter.
Do not whisk or over-mix this mixture.
Place both pieces of string under the prepared spring-form pan, centre of strings matching centre of pan.
Pour the batter into the cake pan.
Insert the pears into the batter until they are almost touching the bottom but leave a little bit of batter underneath them.
Cover the pan with the parchment paper ‘lid’ and tie the strings around the pan to make a handle (as shown in the video).
Place a steamer rack in the pressure with 2 cups of water. For stovetop pressure cooker: Add one extra cup of water.
Gently lower the cake tin onto the rack and leave the string in there.
Close the pressure cooker.
Turn the valve to the closed position.
Set the settings on manual, maximum pressure for 38 minutes.
Press the start button and let the pressure cooker do its magic.
For stovetop pressure cooker: Steam for 38 minutes as from the first whistle.
After the time is up, let the pressure go down naturally, i.e. do not quick release it. This will take about 20 – 25 minutes.
Once the red indication is down in the ‘safe to open’ position, open the pressure cooker.
Grab the strings and remove the cake tin.
Remove the parchment paper lid.
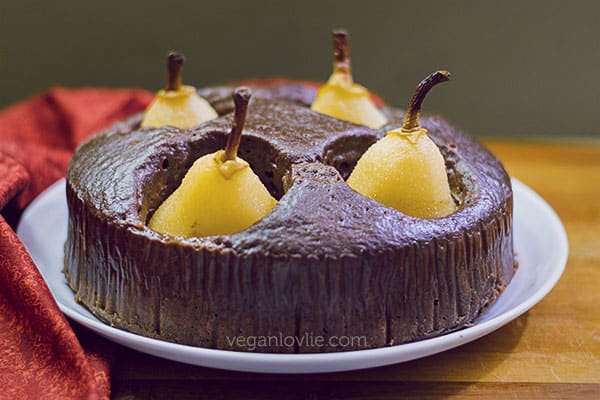
Test for doneness by inserting a skewer in the middle of the cake away from the pears. It should come out clean with just a few crumbs but no batter.
Allow the cake to cool completely before demoulding.
Baking instructions: Bake in a preheated oven at 180C / 350F for 40 – 45 minutes or until a skewer inserted in the middle comes out clean.
For the ganache –
Make a double boiler by placing some water in a saucepan with a bowl on top.
Turn on the heat.
Break the chocolate into the bowl.
When the chocolate starts to melt, stir a few times until all is melted and smooth.
Remove the bowl from the saucepan and add the milk a little at a time while continuously stirring.
You should get a smooth thick chocolate sauce with a dripping consistency but not runny.
Drizzle or spread the chocolate ganache on the cake using a spoon or spatula. You can smooth it out around the edge if you wish but I like the irregular drippings.
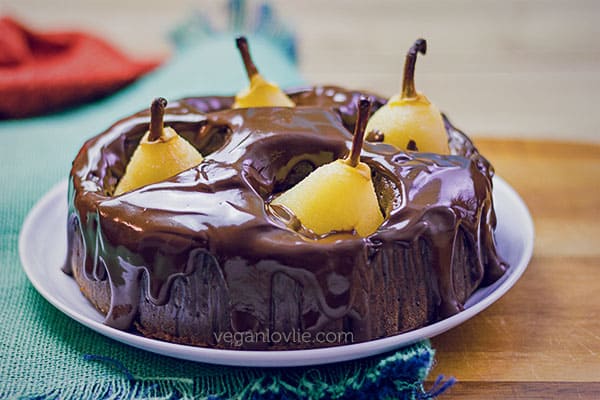
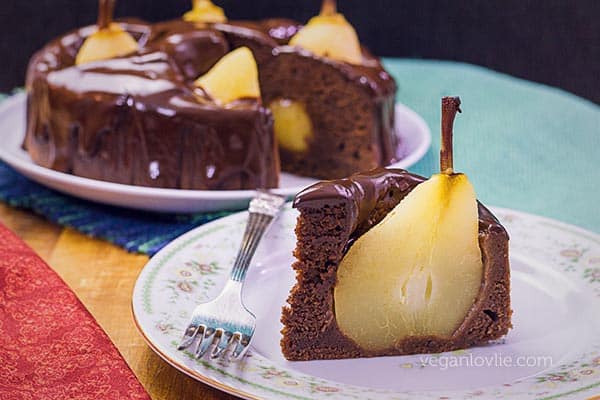
To serve make sure to cut half a pear with each slice of cake.
This cake will keep in the refrigerator for 3 – 4 days and it is even tastier the next day.
You may serve it cold or warm with a scoop of ice cream.
Pear Chocolate Cake in a Pressure Cooker
Ingredients
- 4 ripe California Bartlett pears, peeled and bottom part removed
For the cake:
Dry –
- 150 g whole spelt flour, [1 1/4 cups] substitute with wholewheat or all-purpose/plain flour
- 30 g cocoa powder, [5 tablespoons]
- 12 g cornstarch, [1 tablespoon]
- 1 1/2 teaspoons baking powder
- 1/8 teaspoon baking soda
- 1/8 teaspoon salt
- 1/2 teaspoon cinnamon powder
Wet –
- 225 mL soy milk, [1 cup + 1 tablespoon], almond, cashew or coconut milk is also good
- 1 tablespoon rice vinegar, apple cider vinegar or lemon juice is also good
- 1 teaspoon vanilla extract
- 135 g granular sugar, [2/3 cup], like demerara, turbinado or blond sugar
- 60 mL melted coconut oil, [1/4 cup], sunflower or olive oil is also good
Chocolate ganache glaze
- 50 – 100 g dark chocolate, [1.7 – 3.5 oz], *see notes
- 60 – 120 mL non-dairy milk, [1/4 – 1/2 cup], I used soy milk
For the pressure cooker** (see notes)
- 2 cups water
Bakeware and materials
- 18 cm spring-form cake pan, [7-inch]
- For smaller pressure cookers, use a 15 cm / 6-inch spring-form cake pan. (Measure the diameter of your pressure cooker to be sure).
- Parchment paper /aluminium foil, if using
- Cotton twine or other piece of strong string – 2 pieces, each 4 times the width of the pan. This will help to create a handle.
- Steamer rack
Instructions
- Prepare the cake pan, parchment paper ‘lid’ and string according to the instructions above. (Watch the video for visual instructions).
- If you are baking the cake, preheat the oven at 180C / 350F.
Prepare the pears
- Peel the pears and remove the bottom part.
- Rub them with a slice of lemon to prevent browning.
For the cake
- In a measuring jug, place the milk and vinegar. Leave the mixture to stand for a few minutes.
- Meanwhile, in a large mixing bowl, mix all the dry ingredients together.
- In the measuring jug, add the rest of the wet ingredients and stir well.
- Make a well in the centre of the dry ingredients and pour the wet ingredients.
- Mix to incorporate all the ingredients into a smooth batter.
- Do not whisk or over-mix this mixture.
- Place both pieces of string under the prepared spring-form pan, centre of strings matching centre of pan.
- Pour the batter into the cake pan.
- Insert the pears into the batter until they are almost touching the bottom but leave a little bit of batter underneath them.
- Cover the pan with the parchment paper ‘lid’ and tie the strings around the pan to make a handle (as shown in the video).
- Place a steamer rack in the pressure with 2 cups of water. For stovetop pressure cooker: Add one extra cup of water.
- Gently lower the cake tin onto the rack and leave the string in there.
- Close the pressure cooker.
- Turn the valve to the closed position.
- Set the settings on manual, maximum pressure for 38 minutes.
- Press the start button and let the pressure cooker do its magic.
- For stovetop pressure cooker: Steam for 38 minutes as from the first whistle.
- After the time is up, let the pressure go down naturally, i.e. do not quick release it. This will take about 20 – 25 minutes.
- Once the red indication is down in the ‘safe to open’ position, open the pressure cooker.
- Grab the strings and remove the cake tin.
- Remove the parchment paper lid.
- Test for doneness by inserting a skewer in the middle of the cake away from the pears. It should come out clean with just a few crumbs but no batter.
- Allow the cake to cool completely before demoulding.
- Baking instructions: Bake in a preheated oven at 180C / 350F for 40 – 45 minutes or until a skewer inserted in the middle comes out clean.
For the ganache
- Make a double boiler by placing some water in a saucepan with a bowl on top.
- Turn on the heat.
- Break the chocolate into the bowl.
- When the chocolate starts to melt, stir a few times until all is melted and smooth.
- Remove the bowl from the saucepan and add the milk a little at a time while continuously stirring.
- You should get a smooth thick chocolate sauce with a dripping consistency but not runny.
- Drizzle or spread the chocolate ganache on the cake using a spoon or spatula. You can smooth it out around the edge if you wish but I like the irregular drippings.
- To serve make sure to cut half a pear with each slice of cake.
- This cake will keep in the refrigerator for 3 – 4 days and it is even tastier the next day.
- You may serve it cold or warm with a scoop of ice cream.
Video
Notes
Pin this gorgeous Pear Chocolate Cake recipe for later.
Full disclosure: This post is sponsored by California Pears. We only endorse products and services that we like, enjoy, use and that we believe, based on our experience, are worthy of such endorsement. We value the trust of our readers and subscribers. We believe in honesty of relationship and opinion. The views and opinions expressed on this blog are 100% ours.

Leave a Reply