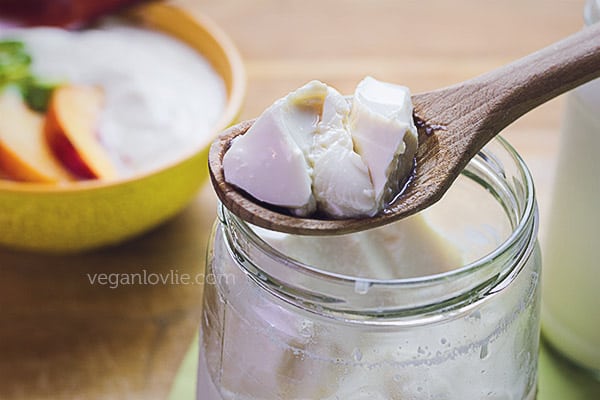
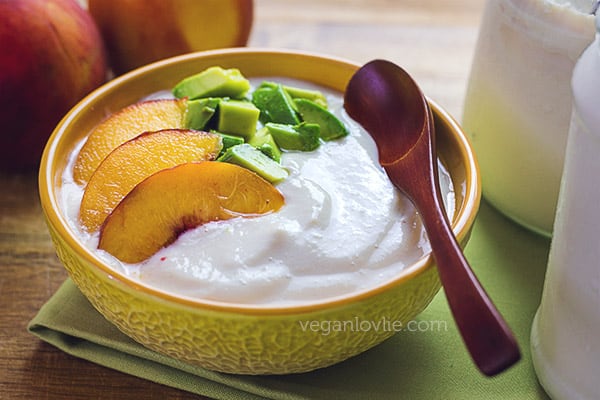
Thick creamy soy yogurt that sets like a charm without any yogurt maker and is delicious! With only two ingredients, the process is much simpler than you think; you may never buy vegan yogurt again. Serve with your favourite toppings or add to smoothies and why not to curry sauces for that extra depth of flavour.
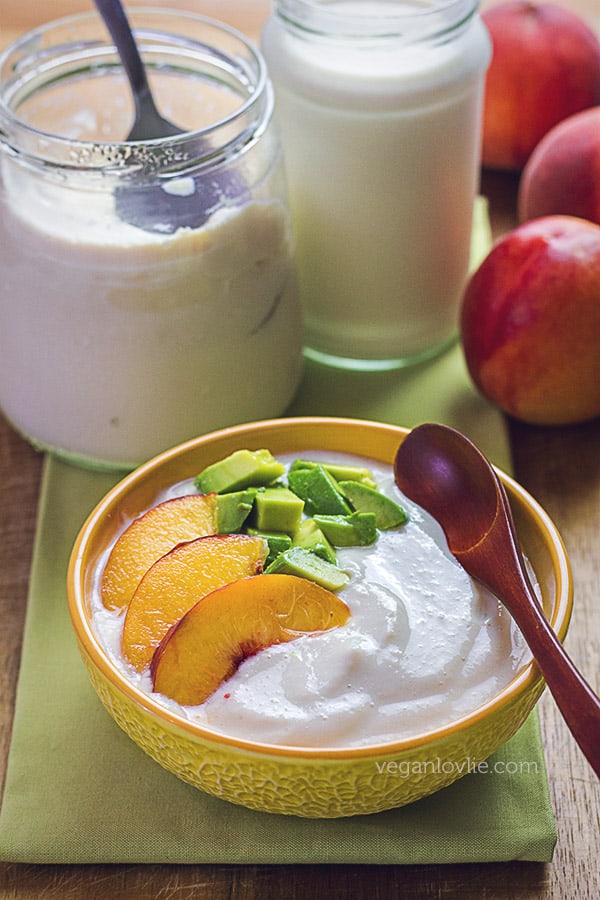
One thing that I still haven’t found a brand that I love here in Canada is vegan yogurt. There is a particular brand of coconut yogurt that I sometimes buy but so far, none have quite ticked all the boxes for me in terms of taste, texture, flavours and not to mention price.
In the UK and Ireland, I used to love Alpro Soya yogurt. This is not a sponsored post by the way. I just loved Alpro, they definitely did the best yogurt I’ve ever tasted. I preferred it even to the dairy yogurt that I used to have before.
It was quite a shock for me the first time that I had store-bought vegan yogurt in Canada. It just was not yogurt. The texture is what I find to be plain weird. It’s ladened with thickeners that creates a somewhat gel-like gummy consistency that is just not what I know yogurt to be like.
Naturally, I had to get my hands on making my own yogurt. My mum used to make milk curd back in the day when I was a kid and I used to love her homemade yogurt so much.
The great thing about yogurt is that you only need a starter for the 1st batch. Then after that, you just use a little bit of the yogurt that you get as a starter for the next batch and so on. If you keep the cycle going and once you get the hang of it, you’ll have an endless supply of delicious homemade yogurt with no gums, thickeners, sweeteners, additives or weird flavours.
There are a few things to keep in mind when making vegan yogurt.
The Choice of Plant-based Milk
The plant-based milk that you use has to contain a high amount of protein. My preference is homemade soy milk. But you can also use homemade almond or cashew milk. Coconut milk will require some thickeners and I have my own recipe and method of making coconut yogurt that I’ll keep for another day.
I strongly recommend using homemade milk if you want to have good quality yogurt that sets properly. Store-bought plant-based milk don’t have enough protein, and the additives — thickeners, sugar or vanilla/flavourings — may prevent the yogurt from setting properly.
Store-bought Soy Milk
If you want to use store-bought milk, you need to find a good quality one that contains soy (or almond/cashew) and water only, like Edensoy (in Canada) or Westsoy (in the US). Otherwise, just go for homemade, it makes a big difference in taste and texture.
The Temperature
For successful yogurt to happen, the temperature of the milk is important. Around 42C /108F (but not less) is the optimum temperature for the starter without killing the friendly bacteria. If you don’t have a thermometer (I don’t either), just test the temperature by touch. Make sure your hand is very clean then bend your first finger and dip your knuckle into the soy milk. The temperature should be warmer than your body temperature. If you can’t hold your finger in there for more than 5 seconds then the milk is too hot. Leave it to cool a little longer.
For the second batch of soy yogurt, you will be using the yogurt that you made from the first batch. Since you would have kept the yogurt in the refrigerator, it will be cold. So, leave the starter yogurt on the counter for at least 2 hours or until it reaches room temperature (between 18-24C or warmer depending on region). Then mix the starter with the warm soy milk. If you were to use the cold yogurt right out of the fridge, it would cool down the soy milk too much and the lower temperature won’t activate the starter.
If you are thinking of heating up the soy milk to a higher temperature to make up for the temperature loss (of using the cold yogurt), then toss that idea out of your head. The higher temperature will most probably kill the starter in the yogurt, resulting in no curdling at all. Or you might end up with watery yogurt.
The Starter
You may get a vegan yogurt starter but I’ve been using probiotic capsules with excellent results. You can get any one out there. I use the Now Probiotic-10 25 Billion capsule. You may also use acidophilus formula with 2.4 billion CFUs per serving. Both comes in a vegan gel capsule that you can easily open and use the powder inside.
When I make the 1st batch of yogurt, I like to start with a slightly stronger concentration of probiotic – 1 capsule per cup [240 ml] of soy milk. This will yield a really tangy yogurt. Once you get the first yogurt, use 1/2 cup [120 ml] per litre of milk for subsequent batches. Your yogurt will get better with the 3rd batch onward. And by then, you’ll probably be making homemade yogurt all the time.
If your yogurt starter stops working or starts producing watery yogurt, then go back with the capsules again and make some fresh starter.
The Fermentation
You don’t need a yogurt maker, crock pot or pressure cooker with yogurt setting to make yogurt. You can use your oven with the lights turned on for the whole fermentation time, or (if there are no lights in your oven) preheat it on the lowest temperature for about 10 minutes. Then turn off the oven before placing the yogurt pots in. If the climate where you live is very warm (above 30C / 86F indoor), you may just leave the yogurt pots in an undisturbed warm place on the counter.
How to Make Soy Milk + Soy Yogurt
The video below guides you through the process of making the homemade soy milk and then the soy yogurt.
Homemade Soy Yogurt
Ingredients (for 1 litre of yogurt)
1 litre of homemade soy milk (watch the video above or use unsweetened PLAIN soy milk with water and soybeans as the only ingredients like Edensoy [in Canada] or Westsoy [in the US])
Starter –
1st batch only: 4 probiotic capsules (with 25 billion CFUs each or 5 capsules with 2.4 billion CFUs each)
All subsequent batches: ½ cup [120 ml] of plain yogurt from your last batch as a starter
Directions
If using the oven for incubation, preheat it at the lowest temperature for 5 – 10 minutes.
Place the milk in a saucepan and bring to a boil.
Turn off and let it cool down to about 42C / 108F.
Open the probiotic capsules and sprinkle the powder onto the milk.
Whisk and stir until all powder is dissolved.
Pour the milk into clean pots and screw the lids on.
Tun off the oven and turn the light on (if it has a light bulb).
Place the yogurt pots in the oven or leave them in a warm (above 30C / 86F) undisturbed place.
Leave to ferment for about 8 hours.
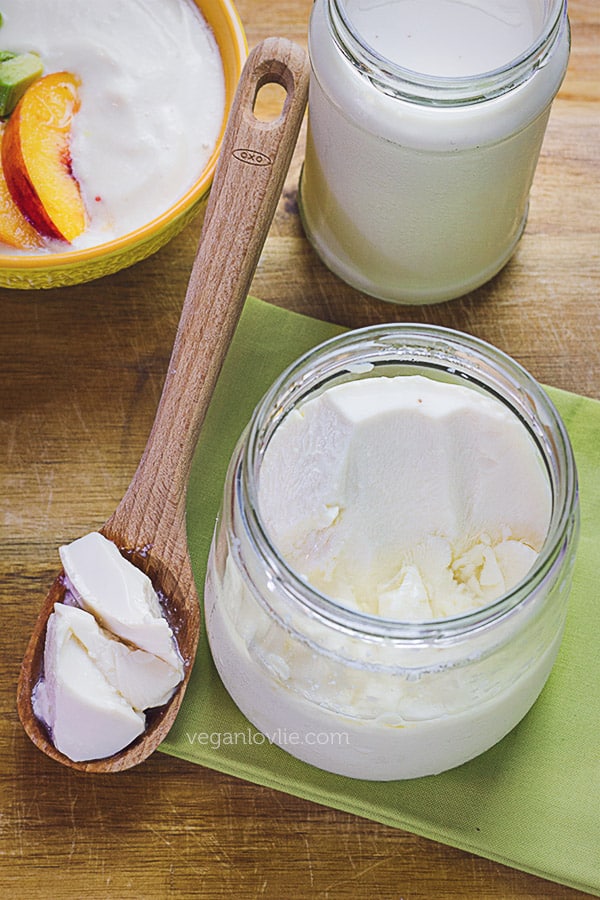
The yogurt will be set by this time.
Transfer to the refrigerator.
Save 1/2 cup [120ml] of yogurt from this batch for the next one as starter, i.e. you don’t need the capsules again for the next batch. You can use the yogurt from the last batch for each subsequent batches.
To serve, you may whisk the yogurt a little for a creamier texture and add sugar, maple syrup or other sweeteners of choice. You may add fruits as natural sweeteners.
Notes: If your yogurt starter stops working or makes watery yogurt, go back with the capsules and make some fresh starter yogurt again.
If you like your soy yogurt sweet, sweeten it after it has set into yogurt. Do not sweeten the milk before. You won’t get the best results with sweetened milk.
Pin this easy process of making soy yogurt for later
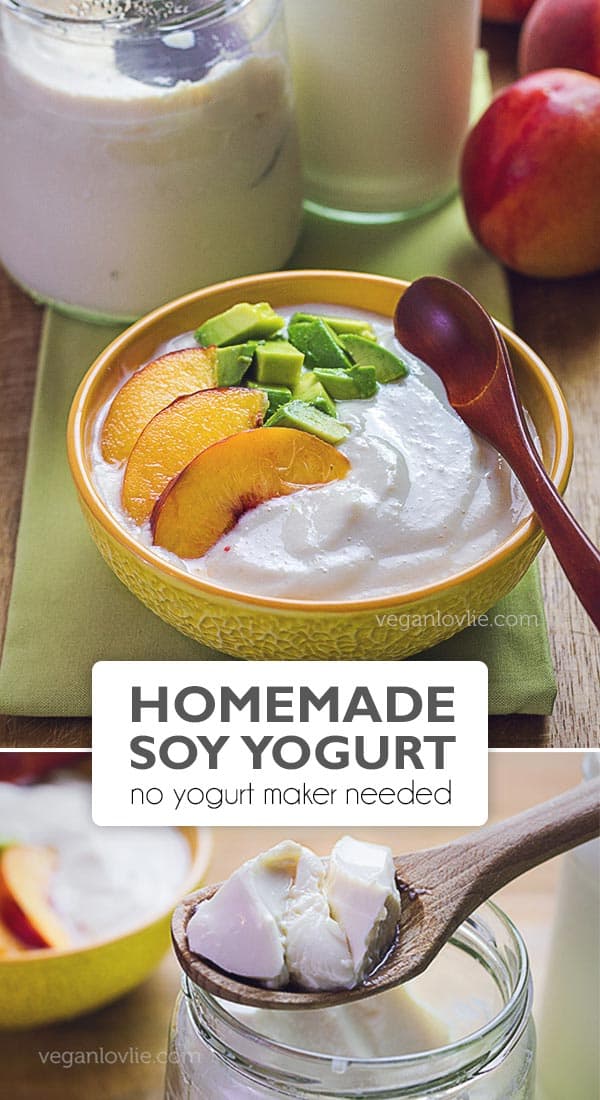
Homemade Soy Yogurt
Ingredients
- 1 litre homemade soy milk, (watch the video [see notes] or use unsweetened PLAIN soy milk with water and soybeans as the only ingredients like Edensoy [in Canada] or Westsoy [in the US])
Starter – 1st batch only
- 4 probiotic capsules, with 25 billion CFU each or at least 5 capsules with 2.4 billion CFU each
All subsequent batches
- 120 ml plain yogurt from your last batch as a starter, [1/2 cup]
Instructions
- If using the oven for incubation, preheat it at the lowest temperature for 5 – 10 minutes.
- Place the milk in a saucepan and bring to a boil.
- Turn off and let it cool down to about 42C / 108F.
- Open the probiotic capsules and sprinkle the powder onto the milk.
- Whisk and stir until all powder is dissolved.
- Pour the milk into clean pots and screw the lids on.
- Tun off the oven and turn the light on (if it has a light bulb).
- Place the yogurt pots in the oven or leave them in a warm (above 30C / 86F) undisturbed place.
- Leave to ferment for about 8 hours.
- The yogurt will be set by this time.
- Transfer to the refrigerator.
- Save 1/2 cup [120ml] of yogurt from this batch for the next one as starter, i.e. you don’t need the capsules again for the next batch. You can use the yogurt from the last batch for each subsequent batches.
- To serve, you may whisk the yogurt a little for a creamier texture and add sugar, maple syrup or other sweeteners of choice. You may add fruits as natural sweeteners.
Video
Notes
Plain Soy Milk (with no additives):
In Canada – Edensoy – https://amzn.to/2O02pZI
In the US – Westsoy – https://amzn.to/2uDxY3v Probiotic capsules:
Now Probiotic-10 25 Billions CPU – https://amzn.to/2uxrzqw
Acidophilus formula 2.4 Billions CPUs – https://amzn.to/2zP85CO Link to Homemade Soy Yogurt recipe – https://veganlovlie.com/homemade-soy-yogurt/
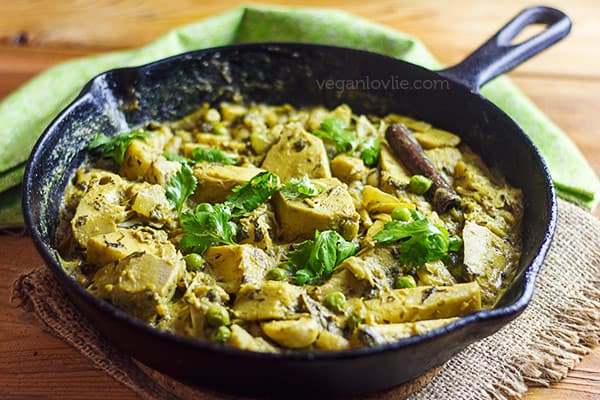
Enjoy your freshly made soy yogurt any way you like. You may also substitute the coconut milk in curries with yogurt for a lighter curry like in this Jackfruit Curry.
Hi Teenuja. I have tried making non-dairy yogurt in the past and haven’t been successful. I tried with rice milk most recently because I love that it has no flavor essentially. We use it exclusively on cereal and in desserts. I make my own yogurt now, with a yogurt maker, and use 1% milk. Could I use 1/2 cup of my prepared (dairy) yogurt to try to make non-dairy yogurt? I mean eventually it would be all non-dairy, no? I’d love to conquer this! Thanks for any help!
Hi Suzy,
The plant-based milk that you use for this method of making non-dairy yogurt has to contain a high amount of protein. Rice milk unfortunately does not contain enough protein and will not set. I recommend soy, cashew or almond milk with nothing added but just water and the soybeans/cashew/almond. I haven’t tried using dairy yogurt as a starter for non-dairy yogurt. I do find it easy enough with the probiotics capsules. You should give them a try.
Thank you for sharing this great recipe. I’m allergic to soy, and I really prefer coconut milk yoghurt. You mentioned that you do have a recipe for coconut milk yoghurt, would you please post a link for that recipe on Instagram as well? You’re recipes are always so amazing! Thank you again for sharing them. Cheers, Melody
Hi Melody, I haven’t shared the recipe for the coconut milk yogurt yet. It will be published at some point on the blog (and maybe with a video on YouTube). Of course, I’ll be sharing the post link on Instagram when I do have it up. So, stay tuned. You can also subscribe to the mailing list and get notified via email if you don’t want to miss it. 🙂
I would also like to have the recipe to make yogurt with another kind of milk, I wanna try hemp milk!
I will check out Youtube in case…
Hi and thanks for all the lovely recipes and well-made videos. I have always made my own yogurt and still do so now we eat vegan. I have found that making it in a jar (rinsed with boiling water before using it) and wrapping that jar in a towel will make a good batch every time. No need to use electricity.
Thank you for the nice tip HGerda. I think this will work beautifully in the summer but it gets pretty cold in the winter here. It’s worth giving it a try though. 🙂
Thank you so much, Lady lovely!
I tried yesterday using a regular yoghurt as starter which is the only culture handy, 1/2 C (mixed with warm soy milk first to disperse) added last to make 4 C (from 1 C bean). Once the filled and capped jars are in the preheated (2 min and stop, did not reach 200F, just warm) warm oven and wrapped in a kitchen towel, they stayed warm after 8 hours. Results are very good. Nice and firm. Great tip, thank you.
By the way, the soy meal is delicious once cooked at low heat on stove to dry as fine powder, add lots oil and scallion in the center, later top with chopped walnuts, or anything you like to the soy meal. Nutritious, too. I’ll use the cooked soymeal powder to add to pancake, stew, noodle soup, cookie, as added nutrition and taste.
thanks for the recipe!
I made it but I put in too much probiotic and now my yogurt smells strong and looks like curdled milk. Any ideas on what I can use it for instead of yogurt?
Hi Audrey, sorry to hear the milk curdled. I guess it might have made the milk too acidic. You could use the curdled milk in cupcakes or muffins and substitute the milk in the recipe. I have a recipe for yogurt cupcakes on the blog if you’d like to try it. I think the strong taste will be masked in the cake and you could use some additional flavouring like vanilla.
You could also add it to savoury dishes like pulao (substitute some of the water) or biryani (substitute some of the coconut milk).
I hope your yogurt turns out great the next time. 🙂
Would you mind sharing how you make your soy milk? I have an old soy milk maker that I use, but I’m wondering if it’s too watery for yogurt. I couldn’t figure out how to search your site to see if you have a post about it.
Hi Rhonda, there is a search bar on the right sidebar where you can type in anything to search the site. For the soy milk, I use 2 and a half cups of water for each cup of soaked soy beans. 1 cup of dried beans yield around 3 cups of soaked beans. So, with this I get a little less than 2L. After boiling the milk, it comes to a little more than 1.5L. I use 1L of this milk to make the yogurt. I have just uploaded a video where I show how I make the soy milk and then the yogurt. The video is now on the post. Please watch it for the step-by-step process. I hope this helps.
I was wondering about the soymilk recipe as well. I watched video and read the blog post, it explains how but not the measurements. So thank you for this comment with the explaining ♡ On the hunt for soybeans tomorrow! And thank you for ALL your amazing recipes
I have a dehydrator could I put the yogurt in there instead of oven?
Thanks!
Hi Snady, I don’t own a dehydrator so I’m not sure what the temperature is like. As long as the heat is between 30 – 35 Celsius, it should be okay. If the temperature is too high, it might kill the bacteria. I hope this helps.
Hi Teenuja. If I use almond milk, do I still need to boil it first, considering that the almonds can be eaten row? Thank you.
You still need to warm it until it reaches a rolling boil but it doesn’t need to be boiled for 15 minutes or longer. Once it reaches boiling point, just turn off the heat and let it cool to about 42C then add the probiotics. I hope this helps.
I did not boil my soy milk first. Is that why it would not set up after 20 hours in the oven with the oven light on. SO sad. I seem to suck at yogurt.
Boiling the soy milk is an essential step. If it’s not boiled, the soy milk is raw and not safe for consumption. Boiling the milk also changes the structure of the protein and this is what allows the yogurt to set if the culture is introduced at the correct temperature. I hope this helps.
Hi! I’m bought the same probiotic as you to try and make this recipe and was very please to see I could find it here in India as it’s quite hard to find vegan probiotic here …just a question though is the probiotic powder a bit pinkish?…is that normal? It’s my first time using this one so I was bit confused to see it this colour…I hope it’s ok cause it’s sitting on my counter right now and I’ll see in 8 hours how it looks!!! 🙂
Hi Jasmine, sorry for the delayed response. The probiotic I get is also slightly pinkish in colour. I don’t think the colour matters as long as the probiotics are live or haven’t passed the expiry date. Let me know how the yogurt turned out. 🙂
Hello Teenuja, one question about the starter you used that confused me a lot: why do you need 4 capsules containing 25 billions of bacteria and only 5 capsules containing 2.4 billions of CFU (if I understood it correctly) ?
Hi Alessandro, if you have a look at the NOW brand probiotic capsules, they contain 10 different strains of bacteria totaling to 25 billions CFU. Just one of these 10 strains is the Lactobacillus acidophilus. If you are getting just the Acidophilus (Country Life brand), it’s 2.4 billions CFU for that 1 strain alone. I have experimented using just 1 – 2 tablets for the same amount of soy milk, but for a starter yogurt it is a little weak. It might be okay if you are just going to eat the yogurt but it may not have enough bacteria to culture another batch. I hope this helps.
Hi! I’ve made a lot of batches of soy yoghurt already and I really like it, thank you for the recipe! I do have a question, and I’m hoping you can point me in the right ditection. My partner started developing eczema since eating the homemade yoghurt (from homemade milk btw), and he doesn’t get this from regular store-bought soy yoghurt. I have only used organic beans. Maybe I’m not cooking it long enough? I keep it on the stove for 15 minutes, but maybe not fully boiling. Hoping to find the solution! Thanks!
Hi Marlies, you do need to boil the milk. Heat it until it reaches boiling point. I suggest to keep it boiling for a few more minutes while stirring and keeping a close eye on the milk, as it will rise and boil over. Make sure to lower the heat at this stage and keep stirring. The skin formation on the milk is an indication that the protein has changed and the milk is ready for consumption. If the soy milk is not boiled properly, it might cause upset stomach and can even be toxic. I hope this helps.
UHT soy milk has already been heat treated and you can use it straight from the packet without boiling.
You may not need to boil it but you do need to heat the soy milk up to the appropriate temperature for the culture to be activated though.
Hi, Teenuja. Quick questions.
I made this recipe over the past couple of days, but it only set partially (in smooth chunks), and once I strained it, it became more watery. The chunks did not hold their shape. So, I have some questions for you specifically.
1. I see that your ratio is 1 cup of soybeans to 2.5 cups water. However, you end up with 4 cups total of soymilk. I’m not a math person, obviously. How many cups of soybeans are you using in this specific recipe (to be used with four probiotic capsules)? I hope that makes sense.
2. I see some other folks had an issue with their milk setting up. I cooked my soymilk on a medium heat, but it only came to a boil towards the end. I started counting my cooking time a few minutes after I put it on the burner. It is supposed to be actively boiling the entire time? In other words, should I start the “cooking time” once it starts actively boiling? If you can be more specific, at what temperature for how long do I need the soymilk to be in order for it to be cooked properly?
3. I think I maybe saw the answer to my question in the comments, but my soymilk did not form a yuba entirely. I got maybe a tablespoon of skin off of the center of the top, and it was not firm-looking like yours. Is that an indication I did not heat it long enough?
4. My soymilk took a long-ish time (about 25 or 30 minutes) to cool down to the 108 temperature. Based on the video alone, I did not see any indication of about how long the cooling process should take. As a person who is just starting out with making yogurt, it would be helpful to have a ballpark of how long I can expect to wait after it is of the heat for it to cool down sufficiently. I have a candy thermometer, but I think for people who don’t, this info would be even more helpful.
5.Should I toss this batch of yogurt to be on the safe side and start again?
Thank you for your time! I have made several other recipes from your site, and they have all turned out to be real winners. I’m moving on to your tempeh recipe now.
Hi Katie, I’ll try to answer your questions as best as I can, although some of it has already been answered in the instructions and video.
1. About the amount of milk, 1 cup of dried soybeans usually yields about 3 cups soaked. When blended with 7.5 cups water in total, you end up with about 7.5 cups of raw soymilk. When boiled for 15 minutes, some evaporation occurs and this amount is reduced somewhat. By how much this amount is reduced depends on how long you boil the milk for and at what temperature etc. So, in the video, if you watch closely, I am measuring out 4 cups of soymilk to make the yogurt with 4 probiotic capsules. There is still some milk left in the pan. If you want to use up all the soymilk to make yogurt, you just need to adjust the ratio of soymilk to probiotic. I have given the recipe for 4 cups of soymilk. But you just need to multiply that amount for more soymilk.
2 & 3. Yes, the milk needs to be boiled for longer. You can increase the temperature to make it reach a rolling boil faster, then keep boiling until you see some skin forming. The yuba formation is an indication that the protein structure in the soymilk has changed and is ready for drinking or making the yogurt. If it’s easier, just forget about the time indication and rely on the skin formation after the soymilk reaches a rolling boil.
4. How long the soymilk takes to cool down really depends on the room temperature. Some people like to quickly cool the soymilk down by placing the saucepan in a sink filled with cold water. You may do this if you wish. Ultimately, what really matters is the temperature of the soymilk when you add in the probiotic, regardless of how long it took for the soymilk to reach that optimum temperature.
5. I’ve rarely had yogurt that hasn’t set and when I do, I kind of know what I did wrong. Most of the time, it is not boiling the milk enough until I get the skin. In any case, yogurt that hasn’t set is still okay to consume, if it is not smelling off or hasn’t picked up any weird colouring. It just hasn’t set, but there are still some good probiotics in there. I usually blend it with some fruits and drink it. Or I use it in cakes and substitute the plant milk.
I hope this helps.
Hi !
I made the yogurt !
The texture is perfect but It’s not tangy at all !
Not a slight hint of acidic taste…
I don’t know what went wrong, because the texture is really perfect, but it tastes nothing really !
Thanks 🙂
Hi Myriam, if the yogurt is not tnagy, just leave it to ferment for some more time before refrigerating. You can leave it for up to 24 hours and the tanginess will develop. Or you could also add more probiotic capsules. I hope this helps. 🙂
Thank you for this recipe! Two days ago I tried to make it and it was amazing! I also added some bananas, mango, and strawberry. As a sweetener, I used maple syrup
Great to find your recipe and site! I started making mine the same way: soybeans and NOW Probiotic-10 capsules. Works great for me. That was about 3 years ago when there was almost no info to be found other than, “Don’t do it, you’ll die a horrible death from something or other.” LOL. So I was a bit nervous at first.
Now, I use NOW Probiotics-10 50 Billion, powder. It’s easier to measure and add to batches of any size. I generally make 6-8 cups and use about 1/2 teaspoon of probiotics. Great stuff.
I appreciate being able to re-affirm my yogurt method with your post here. Thanks,
Jim B
Teenuja, thanks so much for this recipe and the video to go with it. This was my “entry” to your site, and I’ve been enjoying looking around at your recipes and videos. I’ve spotted several other recipes that I’m sure I’ll love! I made yogurt for the first time ever yesterday, using your recipe, and I was thrilled that it worked out perfectly, so I was able to enjoy some with my breakfast this morning. Your helpful hints and tips were essential… I was especially happy that I didn’t have to venture into my attic to find my thermometer. 🙂
Can I use soy bean pulp in chili for extra protein boost? Do I have to roast soy bean pulp since it’s bean it will be raw?
I made soy yogurt yesterday for the first time and it came out very runny. However, the flavor is great – tangy and delicious. I think that I may have either not boiled my soy milk (homemade) long enough (only a think skin was on top, not a nice thick skin – I read about that just now in another comment) and/or not let it incubate long enough. (Also, I stirred it when I checked it, and have since read to not disturb it.) So, my main question is – should I start over completely with the next batch or should I use some of this as starter? I know it improves with subsequent batches, but I also don’t want to waste a batch if I should just start over. (I used yogourmet starter – regular starter as I’m not bothered if there is a touch of dairy in there.) Any input you have is much appreciated!
Typo – thin skin, not “think” skin.
Do you know the nutritional content of the finished yogurt?
Thank you for the great post and video – very informative! Before I watched your video, I tried making yogurt using homemade soymilk but did not cool it down to 42 degrees. It was straight out of my soymilk maker so I would guess it was much hotter than that – I had to use a potholder to handle the bottle. My yogurt came out very watery with a lot of whey. I am guessing I killed my yogurt starter because the soymilk was way too hot. What can I do with this “yogurt”? Can I use it as a starter for a new batch? Or is the yogurt culture dead? Thank you.
Unfortunately, it didn’t set up. I am not sure what I did wrong. Maybe I need to add more probiotics next time. :/
It’s most probably due to the temperature of the soy milk. Too hot, it will kill the bacteria. Not warm enough, the bacteria won’t be activated.
I have watched your excellent Youtube video for making homemade soy yogurt. I still have one question about making homemade soy milk for use in the yogurt recipe. It seems that many other online recipes recommend skinning soybeans after soaking and before blending with water to make soy milk. In your instructions you do not mention doing so. Is skinning soybeans a time-consuming step that can be omitted? Thank you!
Hi! I am close to having everything to be able to make this at home, so excited! Do you buy your now Probiotic-10 25 Billion from amazon.ca? Does it need to be shipped/stored refrigerated before the first time opening? I thought it needed to be, but I just received my order from well.ca and it was not sent with an ice-pack and am concerned it has impacted the quality of the probiotic. Any advice? Thanks in advance!
Hello and thank you so much for your soy yogurt recipe. I used to make homemade cow’s milk yogurt before going vegan, and find so few vegan yogurts I like. I’m very excited to try this with the organic West Soy and Eden Soy milks I use for my coffee too!
I am confused about the probiotic ratios, as another reader posted a while back also, and maybe you can help give tips based on what I bought? I have the Nordic Naturals NordicFlora Probiotic Comfort 15 billion CFU capsules. How many of these capsules should I use to mix with 32 oz.of soy milk please?
Thank you again for your recipe – I’m so glad I found it, and I hope to make it from scratch in the future so that I can also use all the soybeans! Best, Gina
Hello Gina, I haven’t used the probiotic capsules that you have so I can’t say for sure. I suggest to experiment with 3 – 5 capsules per litre of soy milk and see how it goes. You’ll have to experiment a bit. If the yogurt turns out too firm, reduce the amount of capsules for the next batch. If it’s too watery, increase it. I’d do a smaller batch to test, like 250 ml with 1 capsule. Then, multiply for one litre if it works. Hope this helps.
Thanks for this great recipe and video!
I was wondering if you de-hull your soybeans after soaking, before blending them?
I don’t usually dehull them but you can do. Some people prefer the taste of the soy milk when the beans are dehulled.
I have followed your recipe using homemade soy milk from soaked beans and and it has worked really well but for a recent batch I tried using cooked soybeans to make the milk. The blended mixture was very smooth and almost all went through the cheesecloth (rather than having a fair amount of okara in the cheesecloth as with the soaked beans) and it didn’t set well.
Is it possible that too much fibre (not straining enough) prevents the yogurt from setting firmly?
Hello! Finally making the yogurt tonight! Regarding the homemade soy milk, after 15min on medium heat I didn’t have that nice thick skin so I let it go a little longer at medium high heat. Still no skin and then I felt with the bottom was getting stuck so I lowered it back to medium for another 5min and finally it was there, but thin not as thick as your video. I only read the post about relying more on the thick skin than the time now. Waiting for it to cool so I can add the probiotics and jar the yogurt. Hoping it’s cooked well and not toxic. How would I know?
Sooo, 8 hours later and my yogurt set! I was quite happy seeing as I made 8 cups of milk worth 🙂 I gave one of the jars a stir and it has the nice solid texture with a little bit of liquid. Is that ok? I took a little taste now before placing the 3 jars in the refrigerator and it is tangy and doesn’t smell bad so I think it’s good! My question is when do I set some aside as my starter for my next batch if I don’t want to make my next bath right away? Do I take some and put it aside from the top of another jar from this batch (seeing as I already stirred and tasted from the first jar)? I used 8 NOW capsules as I hade 8 cups of milk. Thanks from the 450 🙂
I can’t thank you enough! I’ve been trying to make soy yogurt for years with spotty success. This came out perfect on the first try. I have made 3 batches so far and the 3rd is definitely the best…creamy and delicious. THANK YOU!
PS…I set it out in the sun to ferment and it was done in a few hours
How long can i keep the yogurt in the fridge?
This yogurt can keep for 4-5 days in the fridge, although I’ve kept mine for up to two weeks and it was still good. If you always use a clean utensil to take it out of the jar, it will keep for longer. Best is to check by smell or if you see any mold forming, then discard.
Thank you so much for the beautiful feedback, Cindy. It’s really great to hear this.
Hi !
I brought the same probiotic capsules as you but mine were pink?!?
I’m guessing thats not the colour they are ment to be as your ones looked white?
Thanks 😊
Sorry for the late response. The probiotic capsules may vary in colour depending on the brand or batch. Mine is also sometimes slightly pinkish which is normal and good to use. I hope this helps.
This recipe is amazing! I wanted to make soy yogurt for ages and your recipe made my dream come true 🤩 I’ve been making batches for over a month now using the yogurt as a starter and it works like a charm!
Oh and BTW a tip for IP(instant pot) users, after the milk has cooled down, pour it to a plastic container and only then mix the yogurt in using a plastic or wooden egg beater for best distribution, and then put it in glass jars and put the glass jars in the IP. Set the ip for yogurt on low for 10 hours
It worked!! I have delicious, tangy soy yogurt!!! It’s SOOOOOO much tastier than the best soy yogurt I can buy, and it’s about 1/3 the cost. Thank you so much!
Thank you so much for this recipe! This is the first one I’ve tried with homemade soymilk that set correctly. After reusing the first batch’s starter once the yogurt gets weak, I want to try to make this using sunflower seeds instead of cashews (fair-trade cashews are expensive in the US). I was almost thinking I would need to go back to using commercial soymilk in the tetrapaks again and am so happy I won’t have to!
Hi. Very good explanation very useful. You curding, but with my english dictionary I cannot find this word, you mean curdling .. :=) cailler le lait. very thanks.
Yes, you’re correct. I mean curdling. I’ve amended it now. Thank you. 🙂