Tempeh is one of the most rewarding things to make at home. I can truly say this now after several years of regularly making it. The initial method that I used, which I blogged about in 2012, were the directions from the shop where I get the rhizopus mould or tempeh starter from.
Over the years, through the experience that I have gained, I have been able to improve the process into a much less laborious one with equally satisfying results.
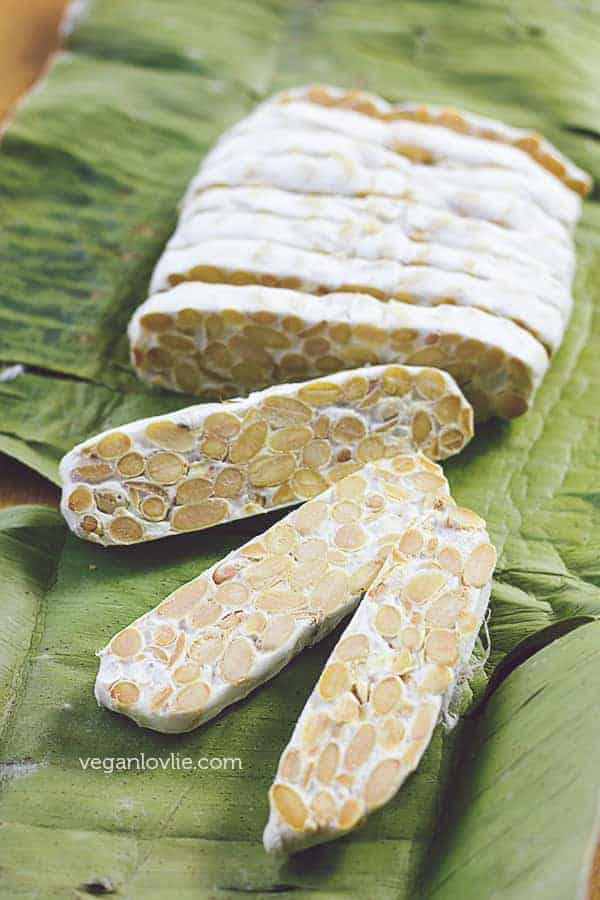
First thing is to get good quality organic and non-gmo soybeans. I buy mine in bulk at the health store. You can also get them online if it makes life easier. Good quality soybeans not only means it is better for your body but it also cooks better and tastes more creamy.
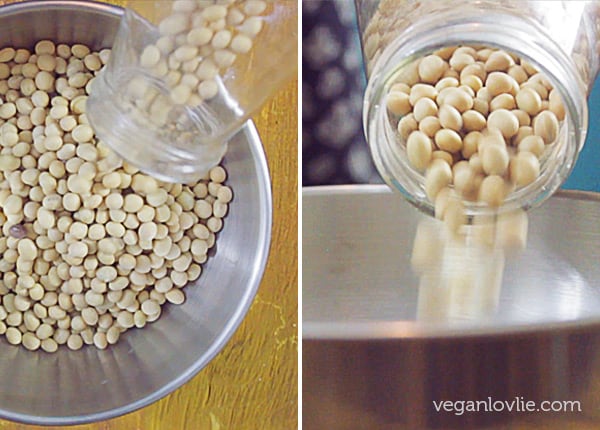
Watch the explicit video below for the easy procedure on how to make tempeh at home.
The written and printable instructions are below.
And if you haven’t already, subscribe to our YouTube channel for more videos. If you choose to be notified when we upload new videos (hover on the cog icon on the channel front page), you’ll never miss one.
Here are the things that I do differently now:
No dehulling of the soybeans.
If you don’t have a grain mill, after soaking the whole beans overnight, the original method instructs to dehull the beans by hand.
This is done by massaging them into the water until the hulls would float up. Then pour them out and keep doing this until most of the beans are dehulled. But this is very time consuming and as it turns out, a rather unnecessary process as I’ve made successful tempeh even without dehulling the beans.
In fact, what I have noticed is that the dehulled beans take a whole lot longer to boil and they do not become as soft and smooth as when they are boiled with their hulls on.
Cooking the beans to be how you like them.
I like to cook the beans until they are soft but not mushy. The previous instructions I used to follow would get the beans to remain at a crunchy consistency.
I figured since I am making my own tempeh, I might as well make it the way I like it. So, I cook the beans to the softness that I would usually consume them. This results in a smooth and creamy texture; something that you will not get with store-bought tempeh.
Adding vinegar at the last stage of cooking.
When vinegar is added at the beginning, I’ve noticed that the beans take far longer to cook. The acidity considerably slows down the cooking process.
I guess if you are using a pressure cooker, you can add the vinegar right at the start. But if you are using a pot like I do, then I find it to be a lot more efficient to only add the vinegar at the last stage of cooking.
Not adding the vinegar at the start does result in a slightly different tasting tempeh. The fermented taste is less pronounced but I do not mind this at all as once the tempeh is seasoned and cooked, this is barely noticeable.
The vinegar is needed to provide a slightly acidic environment that favours the growth of the mould. It also adds to the characteristic nutty mushroom flavour of the resulting tempeh.
Where to buy the Rhizopus mould (tempeh starter)?
Europe and International: I really recommend buying the mould from here. This is from where I buy mine and I have always gotten excellent white tempeh with no black spots. They ship internationally.
Canada and U.S.: You can find Tempeh Starter on Amazon for Canada and the U.S..
For soy-free tempeh:
If you plan on making soy-free tempeh, you may want to get the soy-free tempeh starter in Canada from here and the U.S. from here.
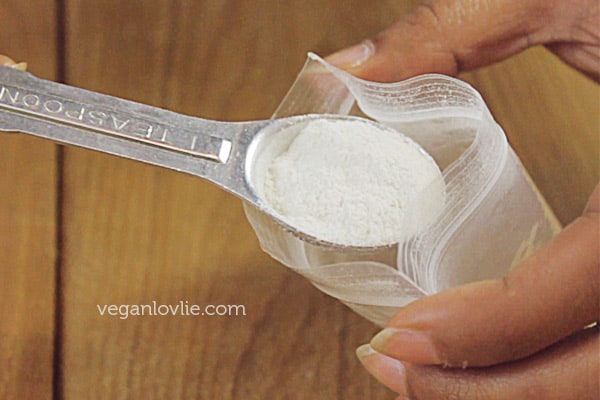
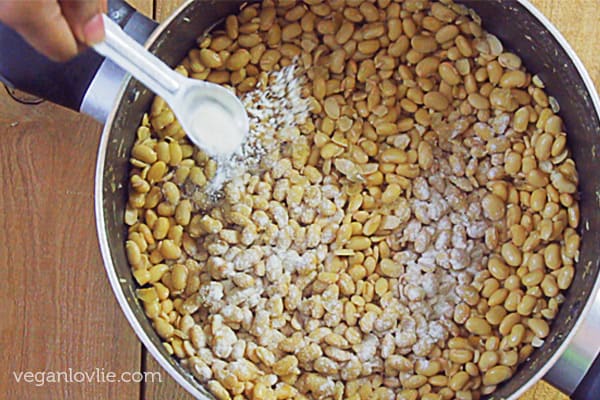
Other ingredients/materials needed for making tempeh
Dried soy beans
Apple cider vinegar
Reusable Ziploc bags
Stainless steel bowl or another type (for soaking beans)
Cooking pot
Banana leaves, if using, find them at an Asian grocery store in the frozen section
Tips
Feed the bean soaking water to the plants.
Keep this water that the beans have been soaking in overnight and feed it to the plants. This water is not good for us but it’s a good source of nutrients for the plants. This is better used for outdoor plants rather than indoor ones as the liquid might smell after a day or so.
Alternative to plastic bags for the fermentation process.
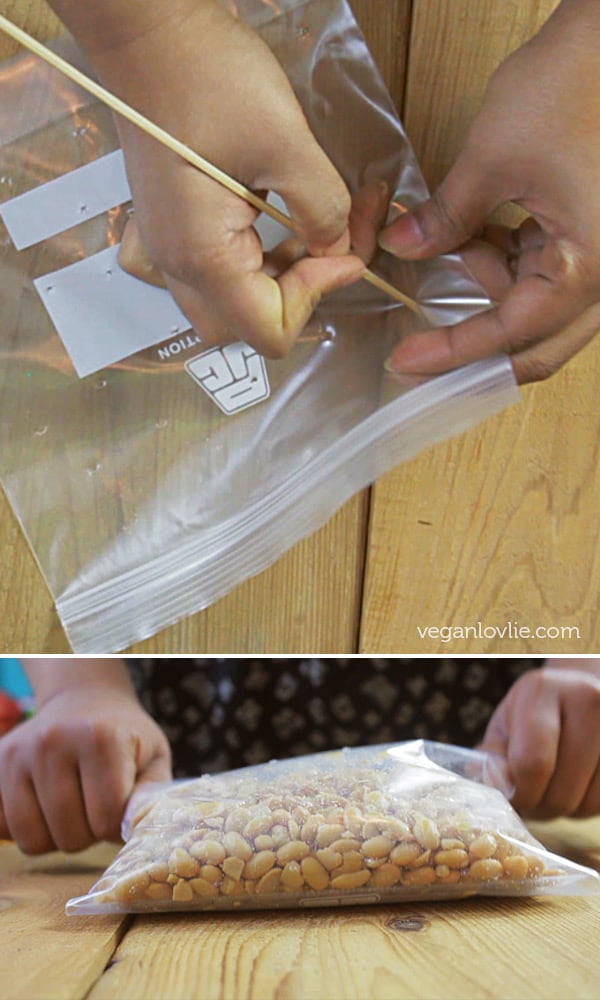
I have been using plastic zip lock bags that I usually perforate at about an inch interval all over the bag with a bamboo or metal skewer.
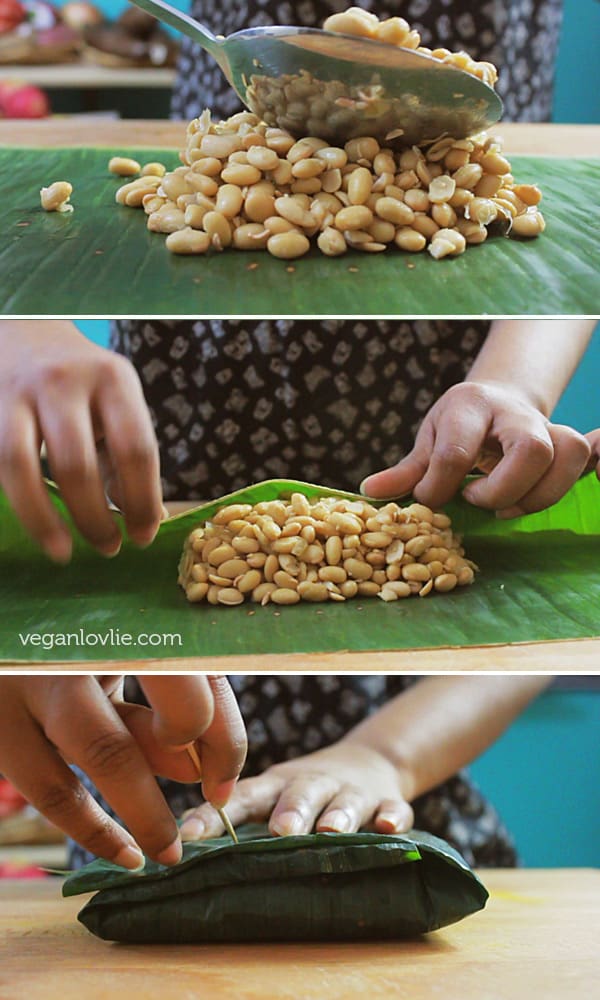
However, I can now find frozen banana leaves at my local Asian store. So, they make a great alternative to using plastic. Banana leaves are porous and do not need any perforations.
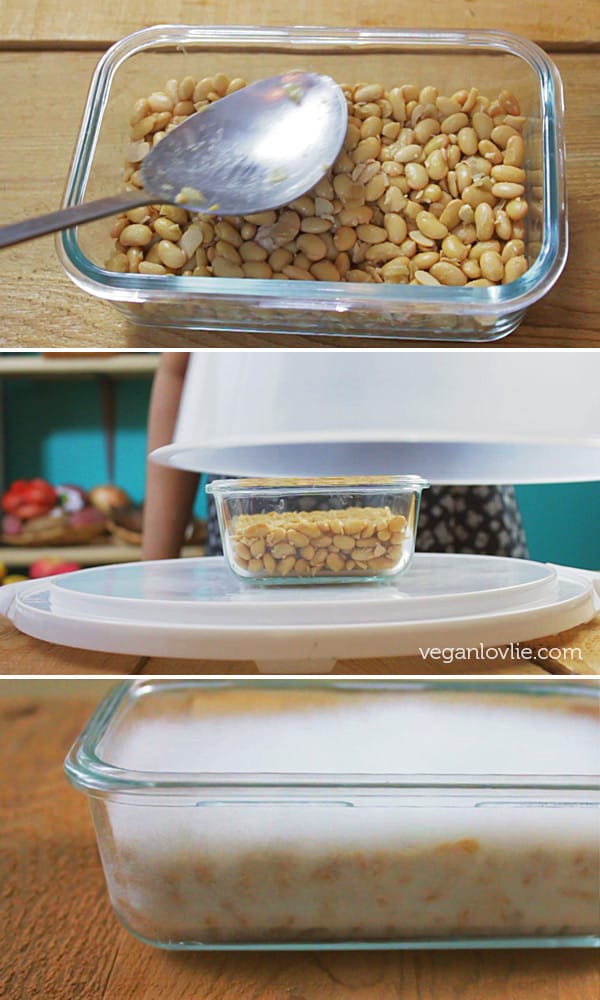
What I have also found to work is to just place the beans in a glass or ceramic dish. Then place the dish uncovered in a closed large box. I have one of those cake boxes with a lid that seems to work great for that purpose.
Otherwise, you can just use any large plastic box. You need to keep the lid on though except when you are checking on the tempeh. The spores tend to go a little out of control with this method though. Also, the resulting tempeh is a little less compact and drier than when using a bag or wrapped leaf. But the tempeh cake still holds together well. Make sure to thoroughly wash the box afterward to clean it of all remaining spores.
Alternative to using an incubator.
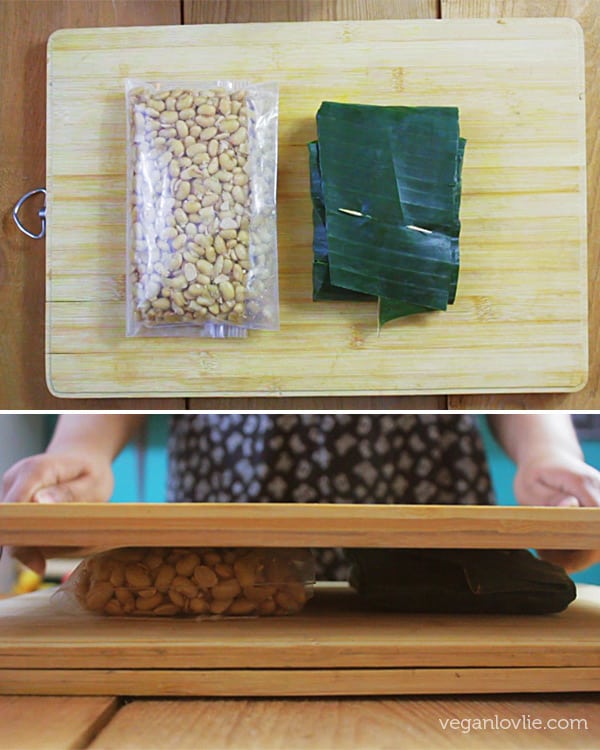
I have actually never used an incubator when making tempeh. I either leave the bags or wrapped leaf sandwiched between two board close to a radiator or I keep them in the oven with only the light turn on for about 12 hours. After 12 hours, the beans should start to generate their own heat from the fermentation. Then, they can be removed and placed outside in a warm place. You can cover the boards with a tea towel.
Making tempeh with other beans, legumes or grains
Apart from soybeans, tempeh can also be made with other beans, legumes, grains, or a mixture of these along with some seeds added in for extra nutrients, taste and texture.
If you make soymilk or tofu at home, a good way to use up the okara, that is the leftover soy pulp, is to make tempeh with it. This works out to be very economical. In fact, this is how tempeh was discovered in Java, Indonesia, during the production of tofu. The discarded soybean pulp caught the spores and grew around the pulp. It was found to be edible and tempeh was born.
Okara Tempeh
If using okara, you would just add a quarter of the amount of vinegar to the pulp and warm it up to about 35°Celsius (or 95°Fahrenheit). Then mix in the mould and proceed as for the rest of the recipe.
Chickpeas along with lentils and other legumes make great soy-free options for tempeh. The procedure is pretty much the same for these.
Other variations that I have not personally tried make us of seeds like sunflower or sesame seeds (to which I am allergic) and rice combined with the soybeans.
Apparently, adding brown rice with the soybeans produces a somewhat alcoholic tempeh from the fermentation. I haven’t given this a try; I am not sure about a boozy tempeh! But some might like it. If you have attempted the mixed rice tempeh, I would love to know what you thought of the taste.
Nutritional benefits of tempeh
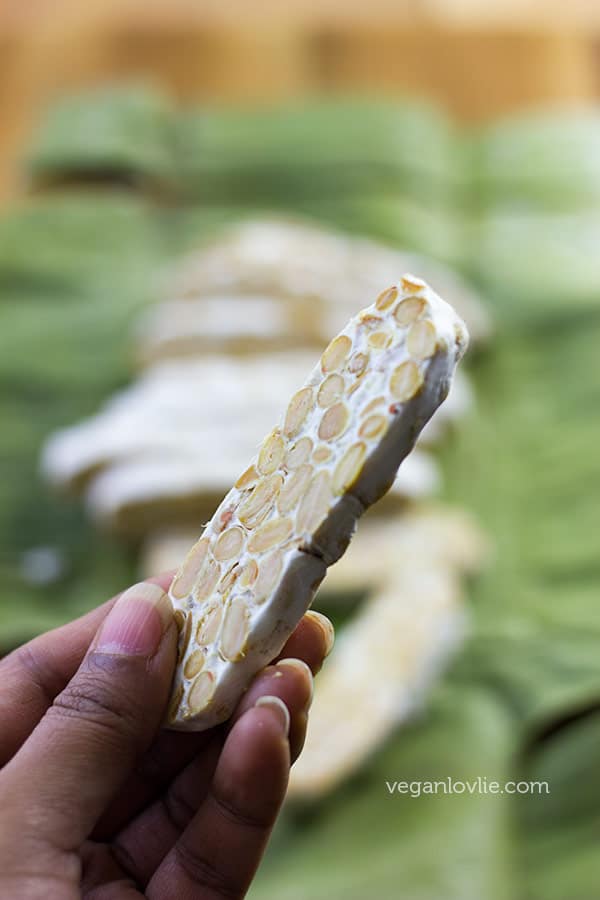
Apart from protein and fibre present in soybeans, tempeh offers a much more nutritious and digestible way to eat soy if you are not intolerant or allergic. The fermentation process reduces the phytic acid in the soy and this allows the body to better absorb the minerals. The gas causing substances are also considerably reduced by the rhizopus mould.
There may also be some vitamin B12 present in tempeh (according to Wikipedia), although it is quite hard to determine the quantity as this greatly varies with the starter culture itself and the environment. Overall, tempeh offers a much more nutritious and digestible way to eat soy.
Recipes using tempeh from the blog:
Low Calorie Shirataki Spaghetti Stir fried with Vegetables & Tempeh
How to Make Tempeh – Easy Method
Ingredients
2 cups [400g] dried soybeans (or 5 cups [900g] cooked soybeans)
4 tablespoons apple cider vinegar
3/4 teaspoon rhizopus mould (tempeh starter)
Directions
Soak the beans overnight or for at least 8 hours. Then drain the water. (You may keep this water and feed it to the plants).
Rinse the beans a couple of times with fresh water then place them in a large pot and fill with fresh water to cover them so that the water level comes to about an inch above the beans. Cover and cook on medium heat.
Keep an eye on the pot and if the water starts to boil over, place the lid at a slight angle to let more of the steam escape. Then lower the heat. Once the excess steam has gone down, you can cover the pot again.
Check for the water level every now and then. Check the beans for doneness as from 30 minutes. Add more water if needed to cook the beans for longer. Soybeans may take from 30 minutes to one hour to cook.
Cook the beans until they are almost done or to about 80% done. Then add in the vinegar. Continue to cook the beans until they are soft but not mushy.
Once the beans are cooked, drain almost all of the water.
Once drained, return the beans onto the heat and evaporate the remaining liquid from the pot. Make sure not to dry out the beans but all the liquid should be gone.
Allow the beans to cool to about 35°Celsius (or 95°Fahrenheit).
Then add the rhizopus mould to the beans and mix well.
If using a zip lock bag:
Perforate the bag at one-inch interval all over. Divide the beans in the portion size that you wish and fill them into perforated plastic zip lock bags.
Close the bag and fold if necessary to reduce the size so that you get a nice thickness for the beans. Distribute the beans evenly.
If using banana leaves:
Cut the leaf to the required size (note: leave the stem of the leaf attached; this will prevent the leaf from being torn). Place a portion of beans on the leaf and fold the ends over to enclose them. Secure with a toothpick.
Place the bags or wrapped leaves in between two chopping board and keep in a warm place. You may place them in an incubator or in the oven with only the lights turn on for 12 hours.
After 12 hours, remove from the incubator or oven and keep in a warm place for the rest of the fermentation.
If using a glass or ceramic dish:
Get the dish and a large plastic box ready.
Place the beans in the dish and level them out. Place the dish uncovered inside the plastic box and keep closed in a warm place for 36 – 48 hours.
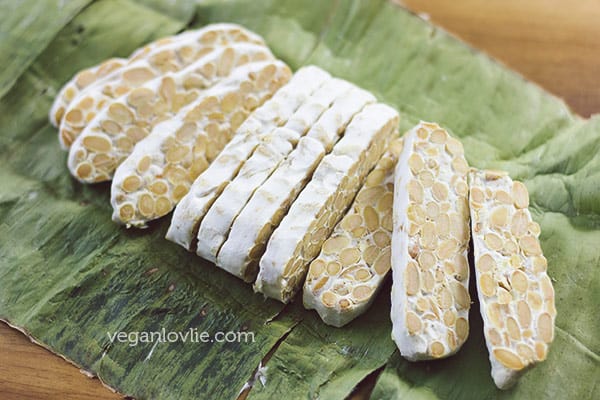
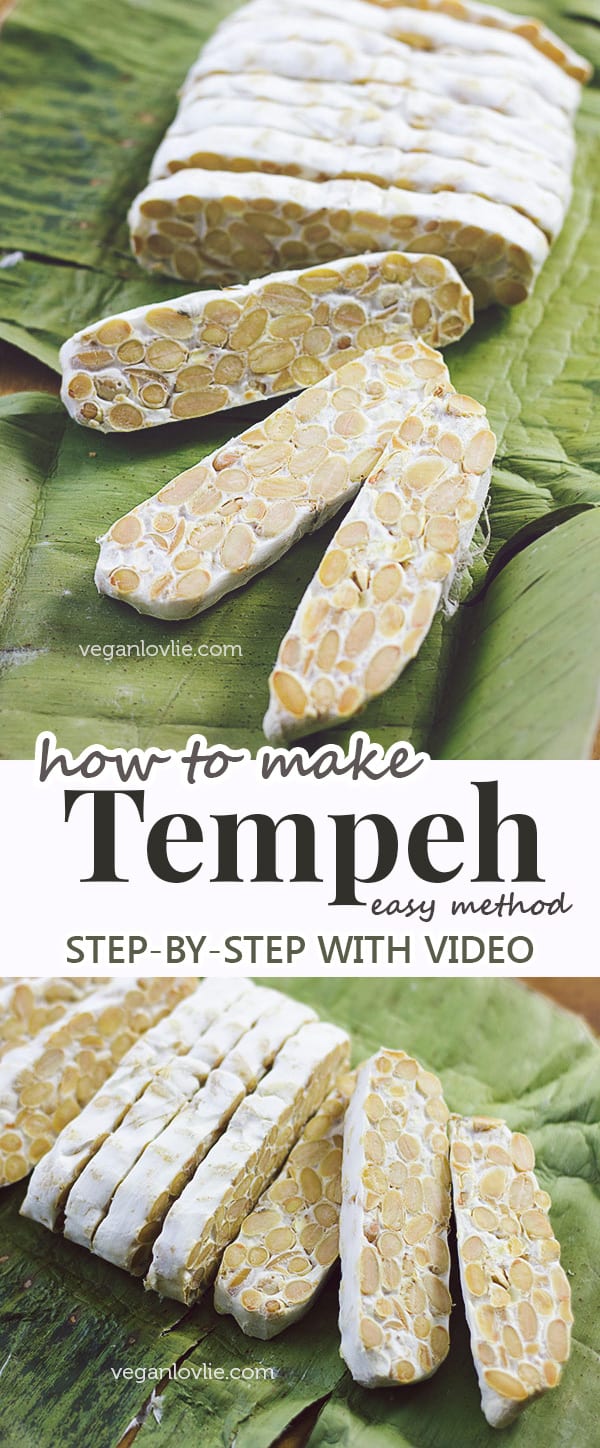
After 36 to 48 hours (in either of these methods), the spores should be fully grown and the tempeh is ready. Cut and divide into smaller portions if you wish for storage.
Tempeh will keep for a week in the refrigerator or for several months in the freezer. I freeze mine for up to 6 months.
Tempeh has to be properly cooked before consuming. It can be steamed or boiled, marinated and pan fried or used according to your favourite recipes.
How to Make Tempeh – Easy Method
Ingredients
- 2 cups dried soybeans, [400 g], or 5 cups [900 g] cooked soybeans
- 4 tablespoons apple cider vinegar
- 3/4 teaspoon rhizopus mould, tempeh starter, see notes
Instructions
- Soak the beans overnight or for at least 8 hours. Then drain the water. (You may keep this water and feed it to the plants).
- Rinse the beans a couple of times with fresh water then place them in a large pot and fill with fresh water to cover them so that the water level comes to about an inch above the beans.
- Cover and cook on medium heat.
- Keep an eye on the pot and if the water starts to boil over, place the lid at a slight angle to let more of the steam escape. Then lower the heat. Once the excess steam has gone down, you can cover the pot again.
- Check for the water level every now and then. Check the beans for doneness as from 30 minutes. Add more water if needed to cook the beans for longer. Soybeans may take from 30 minutes to one hour to cook.
- Cook the beans until they are almost done or to about 80% done. Then add in the vinegar. Continue to cook the beans until they are soft but not mushy.
- Once the beans are cooked, drain almost all of the water.
- Once drained, return the beans onto the heat and evaporate the remaining liquid from the pot. Make sure not to dry out the beans but all the liquid should be gone.
- Allow the beans to cool to about 35°Celsius (or 95°Fahrenheit).
- Then add the rhizopus mould to the beans and mix well.
If using a zip lock bag:
- Perforate the bag at one inch interval all over. Divide the beans in the portion size that you wish and fill them into perforated plastic zip lock bags. Close the bag and fold if necessary to reduce the size so that you get a nice thickness for the beans. Distribute the beans evenly.
If using banana leaves:
- Cut the leaf to the required size (note: leave the stem of the leaf attach; this will prevent the leaf from being torn). Place a portion of beans on the leaf and fold the ends over to enclose them. Secure with a toothpick.
- Place the bags or wrapped leaves in between two chopping board and keep in a warm place. You may place them in an incubator or in the oven with only the lights turn on for 12 hours.
- After 12 hours, remove from the incubator or oven and keep in a warm place for the rest of the fermentation.
If using a glass or ceramic dish:
- Get the dish and a large plastic box ready.
- Place the beans in the dish and level them out. Place the dish uncovered inside the plastic box and keep closed in a warm place for 36 – 48 hours.
- After 36 to 48 hours (in either of these methods), the spores should be fully grown and the tempeh is ready. Cut and divide into smaller portions if you wish for storage.
Video
Notes
Tempeh has to be properly cooked before consuming. It can be steamed or boiled, marinated and pan fried or used according to your favourite recipes.
Where to buy Rhizopus Mould – Tempeh Starter
Worldwide – http://www.tempeh.info/starter/tempeh-starter.php I really recommend buying the mould from them. This is from where I buy mine and I have always gotten excellent white tempeh with no black spots. They ship internationally. Else you can also find it on: Amazon Canada – http://amzn.to/29Frd7d Amazon US – http://amzn.to/29P9niQ For Soy-free Tempeh Get the soy-free starter on Amazon Canada – http://amzn.to/29FraIK Amazon US – http://amzn.to/29P8p6h Link to original recipe – How to Make Tempeh (Easy Method) – https://veganlovlie.com/how-to-make-tempeh-easy-method/You might also be interested in these pantry recipes that you can easily make from pantry staples.

Pin this Tempeh recipe for later.

I have read that you should steam the tempeh before freezing – do you do this, or do you freeze it raw?
Hi Laura, I usually freeze it raw. Then, when I need to use it, I steam or boil it both to defrost the tempeh and to de-activate the mould. You could steam it before freezing but since I will have to defrost it anyway, I find this unnecessary. I hope this helps. 🙂
I would like to know how much okara to use to make the tempeh? Have you tried that yet? it would also be nice for you to show it in a video I learn well with your videos thanks
Hi Darla, yes I’ve made tempeh using okara. It has such a nice texture. I really recommend it. I use the same amount of beans, then extract the milk from it and use the leftover pulp to make the tempeh. I plan to make a video specifically for okara tempeh in the near future as I’ve had a few requests for it. So, stay tuned. 🙂
looking forward to that video
Hi! I followed your instructions and I’m at hour 96! The white mycelium has covered most of the mound but there are some unchanged spots. I used a large ziplock for the entire batch and don’t have an incubator – I used the oven with the light on and then moved it to a cabinet – and I’m wondering if it just needs more time. How long should I keep it going before it goes bad?
Thanks for your guidance!!!!
Hi,
I’d really really appreciate it if you could reply ASAP. As I’m in the middle of the process of making tempeh. I used a large glass container to make my temeph. From the start it has been in the glass container and it was covered by a steel mesh strainer and most of the times placed under a ceiling fan. I am writing this when it has been 30 hours since I started this process. Now all sides are covered with mould except the top layer where most soybean are really really dry( I think not covering it and placed under a fan took away all the moisture and nothing got back to the top surface) so I don’t know if I should wait for the layer to get covered or not also, I should I spray a most of water on the top layer to induce some moisture to the top layer of soybeans which are really dry?
I also end up with a lot of okara after making soy or bean milk and bake it to use as crumbles, but that destroys some of whatever nutrition is left. Soybeans are safer to use after being fermented anyway. I look forward to your feedback about how to make tempeh using okara. I haven’t tried to make any kind of tempeh yet because the Indonesian blend of cultures recommended by another source has been hard to find.
can you add any salt or seasoning before the fermentation?
No, anything other than the vinegar and the mould might interfere with the fermentation and prevent the mould to grow.
My first attempt, following your instructions exactly (except I used rice vinegar) didn’t work. I made a video of my results, if you see this then could you give me an email to send you the video and maybe you could advise me on what I did wrong? It’s winter here and I keep the house cold, so I left the beans in the oven for 36 hours with the light on.
Thanks for getting in touch James. I replied on YouTube comments but since I’ve been asked this question a few times, I’ll paste the answer below for others too. 🙂 I hope you’ll try again and have successful tempeh next time.
The instructions says to:
Place the bags or wrapped leaves in between two chopping boards and keep in a warm place. You may place them in an incubator or in the oven with only the lights turn on for 12 hours.
After 12 hours, remove from the incubator or oven and keep in a warm place for the rest of the fermentation.
If you left them in the oven with the light on for 36 hours, it is far too long to leave them at this temperature. The reason being, after 12 hours, the beans should be generating their own heat from the active mould. So, you just need a warm place (I’d say around 23 – 27 degrees Celsius) to keep them. If your house is cold, then you will have to somehow find a warm place to keep them but not as warm as with the oven light as after 12 hours, condensation will start to form in the bags. And this mould won’t grow in excess humidity. You might get away with banana leaves because the oven light will dry out the leaves and the excess moisture inside will be drawn out through the porous leaves. So if you used plastic bags, then you definitely have to remove them from the oven after 12 hours like the instruction says.
Sometimes it may take more than 36 hours for the beans to ferment, up to 3 days maximum is safe if the beans don’t smell bad.
Condensation will prevent fermentation as mildew will start to form and it also blocks air flow. This is another reason why you need to remove it from the oven and place it somewhere where there is some air circulation. Once the tempeh starts generating its own heat, you can leave it out, just cover the bags with a light cloth or thin tea towel and leave it in a corner. Sometimes my house is at 18-20 degrees Celsius and it still ferments, it just takes about a day longer.
I hope this helps. :)
Hi,
Every time I make tempeh, I always go back to your video! It’s so simple and easy and follow. Today I tried making it, and found out I no longer had any tempeh starter culture so I was left with all these already soaked and cooked soybeans. I have now packed them up in my freezer hoping I can salvage it for next time I have the opportunity to make tempeh. Do think those soybeans will still work in making tempeh?
Thanks a lot for your yummy recipes!
Theresa
I think the beans should still be good to use once defrosted and dried in a pan. The important thing is to get the beans to be really dry (and cooled down) before adding the starter.
Regarding the okara tempeh, is that using raw soya bean pulp, or is your okara cooked as part of your particular soya milk recipe, as okara can be created before or after cooking the soya milk. Have you ever tried getting the culture from previous batches of tempeh rather than the bought culture?
Hi Russ,
Sorry for my delayed reply. The okara that I use is after cooking the soya milk. I make sure to squeeze the okara really well to remove the maximum amount of milk from it. The tempeh culture doesn’t like moisture very much so the okara needs to be rather dry but not completely dry, otherwise the tempeh will be quite crumbly. About trying the culture from previous batches, I haven’t personally tried it but I know some people have had successful results with this method. I might give it a go in the future. 🙂
Could I have some help with doubling the recipe? I usually make tempeh using 4 cups of dry beans. For some reason when attempting this recipe it turns out brownish with only a few spots of mold. Only have made it using a boxed starter in the store before now but those can be expensive.
Doubling the recipe should work fine by just doubling the starter and vinegar. It may be that you are not drying the beans enough before adding the starting. Moisture (including condensation if the beans are too warm) is the main reason that prevents proper fermentation.
I think my first attempt has failed because the environment was too warm… I took the beans out of the warm oven (24 hours in there!) and have re-placed them in a different room. I also added more tempeh culture/starter. let’s see how it goes, but I’m hoping this will kick-start a fermentation process….
Hi Alexandra, the important thing is to get the beans as dry as possible before adding the culture as it doesn’t like moisture. So, if you leave the tempeh in the oven for too long, condensation will start to form. And this is one of the main reasons why fermentation does not occur properly. So, make sure you don’t get any condensation when you are placing the beans in the bags. If you do, take them out and leave them to cool a little bit more. 12 hours in the oven is enough to get the culture to generate its own heat. Then remove the tempeh from the oven and let them somewhere in the room where there is some ventilation (although not cold air or drafts). I hope this helps. Let me know how your second batch turns out.
I’m Indonesian currently in Australia.
It’s my 1st time making my own tempeh and i successfully made it. Very happy indeed ?. Thank you very much for the recipe.
(I made chickpea tempeh).
Okara tempeh! Why haven’t I thought of this before? I actually avoid making tofu because I hate using up the Okara. I have been planning to make Tofu or Tempeh this weekend, now I will make both! Thank you for the inspiration.
Hi there,
I’m about to make okara tempeh, but I don’t know the weight of the beans I started with. With the recipe saying “500g cooked soy beans” could I also use the ratios of the other ingredients if I have 500g okara? (I don’t have that much, but I can reduce the quantities appropriately)
Hi!
Is it possible to make tempeh with store-bought tempeh as a starter? Is the mold alive and is going to grow? And when I make my own tempeh is it possible to use mold from the last batch or do I have to buy new mold every time?
Thanks 🙂
You can use the tempeh from a previous batch to make a new batch but if then don’t let the first batch ferment completely (just half-way through or about 12 hours). Otherwise when it is mixed with the second batch, the tempeh from the 1st batch will be fermenting for too long and may go off. So, the timing has to be right for this to work. I hope this helps.
Hello~ I’ve been searching around for an alternative to using plastic and thought I’d try the banana leaves. Well, I got impatient and used parchment baggies instead since I have them and figured they might work just as well. Do you have any experience using parchment paper? I’m just 3 hours in so I’m not sure if it’ll work but why not try? Thanks!
I haven’t tried with parchment paper but it might work. You do need to poke it like the plastic bag though. I’d suggest poking it carefully after wrapping the beans inside. Let me know how it turned out if you try it. 🙂
Hey thanks for getting back to me 🙂 Looks like it’s growing white stuff in those bags so thumbs up! I did end up putting the bags into glass containers to get those little guys more snug. I think that helped? Either way ~ tempeh on the horizon! Thank you and thanks for putting good things on the internet 🙂
Dr Ruby, that sounds like a perfect solution for me! How did it turn out?
Thank you very much for your detailed recipe and Youtube video! Many successful batches to be made thanks to you!
Hi! Thanks for this wonderful recipe: I just made a batch and I think it’s too dry/crumbly. Is there anyway to make it bind better together, while/after it’s fermenting. My first batch came out too wet so this is why I tried to get it drier and now it’s too dry. Thanks!
If you leave it to ferment just a little longer (about 6 – 8 hours), more mould will form. This will help to keep it from crumbling. If the beans are really dry, there is less chance that the tempeh will turn bad even when fermented for a little longer. In fact, it’s better to have the beans a little more dry than too wet. Just keep a close eye on the tempeh when it’s fermenting for a little longer so that it doesn’t go off. I hope this helps.
I made my first tempeh, and in spite of the mistakes I made, it worked. It was left in the oven for 24 hours instead of 12, and was at 105 degrees Fahrenheit when I took it out. Still, a few hours later, it was obvious that the tempeh was generating its own heat. Then, it was unseasonably cold here last night, and the temperature dropped to 40 degrees Fahrenheit. My drafty old house let in a lot of the cold; the tempeh log was barely warm this morning. The mold had grown enough that I thought it would still turn out. My guess is that it did not ferment as much as it could have, but it was still quite tasty and very filling. For health reasons, my family needs to make dietary changes, and this will be a good start. Thank you for a potentially life changing recipe!
You can sometimes leave the tempeh to ferment for a little longer to get more mould forming. Just check that it doesn’t go bad though.
I just made my first tempeh, and I want to thank you for your clear, straightforward, and explanatory tutorial. You had already answered every question that came up!
Thank you Nathan. I’m so happy to hear this. 🙂
Can I use lemon juice instead of vinegar?
Hi Jess, I haven’t tried it with lemon juice, so I can’t really say. It might be worth trying on a small batch. I sometimes use rice vinegar and it works.
Thankyou so much for the inspiration.
Since trying to go zero waste this year, I’d given up on eating tempeh as it always seems to come wrapped in several layers of plastic. You have inspired me to try to make my own. I’ve just ordered my starter. I’m lucky enough to have access to package free soya beans, so if I make my own, this should be relatively low in waste.
Thank you for you amazing post and informative You Tube video.
Millie. X
Hello,
I’m living in Montreal too, and I was wondering where did you buy your non-GMO soy bean in bulk? I find some at club organic but it’s far from my home.
Hi Pas Mat, I buy my soy beans online on Amazon. I usually get this one (https://amzn.to/2oTjB80) on the Subscribe and Save scheme, it comes out a bit cheaper. I order it every month as I also make soy milk, soy yogurt and sometimes tofu. Sometimes I get the beans in bulk from Marche TAU. It’s about $3/kg, much cheaper than online but I don’t always go there because it’s not that close (walking distance) to my house. I hope this helps. 🙂
Hello , I was wondering . Before I did 1batch and it ended up not hard enough so this time im gonna leave it for longer time for mould to get bigger. I was wondering. This time im gonna do it from 1200grams of soya beans. I was wondering , does it means that I have to triple amount of vinegar too? Or it is gonna be to acidic ? Let me know about what right amound of vinegar I should use for 1,200grams of soya beans. Many thanks !
Hi Jolanta, if you are boiling all the beans in the same pot, then you can add just about 1 – 2 tablespoons more of the vinegar. If you are not getting enough mould within 36 – 48 hours, increase the amount of mould that you add in for the new batch. It may be that the mould that you have is a weak one. Different brands have different strength of mould and some manufacturers mix the mould with rice flour etc. Make sure to dry the beans really well after you’ve drained the water from them and let them cool before adding the mould. Humidity may cause the mould not to grow properly. If you are making such a big batch, you wouldn’t want the beans to go bad. So, make sure you don’t have condensation in the bags (from too much warmth from the beans). Banana leaf is better because it is porous. But if you are using plastic bags, just be more cautious. I hope this helps and your tempeh is successful. 🙂
Hi, I made this but it took a bit longer for the mold to form (5 days) its quite cold here. Do you think it’s still okay to eat?
Love your recipes
Five days might be a bit too much. You do need to keep it in a warm place for the first 12 hours. After this, the tempeh will generate its own heat. If there was enough of the starter and the right temperature, the tempeh should be ready within 24 – 36 hours. To be on the safe side, it’s best not to consume it. Try increasing the starter, this might help the mould grow faster.
Hi
The tempeh took 5 days to work, is it still ok to eat?
Five days might be a bit too much. If there was enough of the starter and the right temperature, the tempeh should be ready within 24 – 36 hours. If it doesn’t smell of ammonia and smells fresh after 5 days, it might be okay but I can’t be sure. To be on the safe side, it’s best not to consume it and try again with another batch. Try increasing the starter and see if the mould forms faster.
Hi ya,
I did mine with black turtle beans with soy starter.
I left mine in the oven for too long as I forgot to take them out. Overall it was a bit more than 48 hours and the oven was about 25 on the first day and the second day it was 30c.
I didn’t bother carrying on as the mould looked well formed already. Plus the plastic bag showed small signs of condensation, so I wanted to get them out ASAP.
I hope it’s ok. It has a yeasty smell but doesn’t smell too bad, I guess if it were bad, I would be able to tell right?
I’ll update you if we all go down with food poisoning or not lol! Thanks for a super easy recipe!
Hello! I grew my own black soybeans last summer & dried them to use. I was wondering has anyone made tempeh from fresh beans vs.dry? I realize the rehydration step can be skipped, but I was curious if it would work, and if so what amounts of fresh beans, vinegar & starter to use vs. dry, rehydrated beans?
For fresh beans, I would use about the same weight as indicated for the cooked beans in the recipe, i.e. about 900 g. And also the same amount for the rest of the ingredients too. You’d still need to boil/cook the fresh beans as per the recipe. I hope this helps.
Hi, thanks for the recipe. I have loved it, but have no tempeh starter. You mentioned it can be shipped internationally. May you give me more information on this. I cannot find it where I am.
Hi Dorcas, I have given a few links about where you can find the tempeh starter in the post above. One of the sources that ships internationally is this one. You can give them a try. I hope this helps. 🙂
First time making it and it turned out perfect. I incubated it in the Instant Pot on the yogurt setting. Thanks for the great recipe.
Hi! My first go making tempeh! It took a lot longer for the mould to grow properly. Like 4 days – started Sunday night and ate some on Wednesday night and still a little loose/mould not dense like store-bought, so I left overnight and popped in the freezer this morning. My question is, although the outside mould is white, parts of the inside is brown and kind of stringy, specifically around the bean. It seems as though these brown stringy bits formed along the ‘seam’ of the bean/hull. Did I mess this up? I’m not feeling sick today but it did provoke a bit of a revulsion reaction..
Hi Alice, black mould formation is usually normal. Any other colour like green, blue or pink is not good and you should discard the tempeh if that’s the case. The main two things that affect proper fermentation and mould growth are temperature and humidity. Make sure the beans are pan-dried after boiling them to remove all the surrounding water/moisture. Then there should be no condensation in the bags when the beans are in. If condensation starts to form, take the beans out of the bag and allow them to cool a little more before placing them in dry bags again. Moisture will prevent the mould from growing. This might be why the tempeh is a bit loose. As for number of days, if it is cold and there’s a little moisture left in the beans, the growth will be slower. Slower fermentation is generally not an issue for up to 3 days. I think 4 days might be okay if you can test the beans by smell. It’s best to properly steam the tempeh before frying or cooking it further. This way all mould are de-activated. I hope this helps. 🙂
It is wonderful to find U in my first search, and You did a great job in offering different container, and processes.
Here I have a couple of questions
1) what are the temperature for the first 12 hours in your oven with light on That is a Good temperature for this process?
2) what vinegar can be used? could you give us some of them U have used ?
3) could you show a video or a photo if possible , I want to see when U use okara, when it is done fermented, how it is look like? In that way, I would feel safe to know it is safe to eat.
thanks so much for your inspiring work for healthy homemade food!
Jasmine,
I tried two batches of making all successful. I see you waiting for some feedback, here I like to offer what I have read and my experiences. 1) if your oven is between 85-91F, it would be safe for the first 12 hours for starter. After that , the package of bean generates its own heat, so the temperature would need to be lowered, I used a probe stick in the package of bean for tracking so I know better that way. Hope this helps this question. 2) I saw her video and other video, you may use white distilled vinegar or apple cider vinegar ( not raw type. ) hope this also helps U. Best of luck!
Hi Jasmine,
Sorry for my delayed response. Somehow the spam filter placed your comment in the spam folder. Anyway, to answer your questions:
1. Around 30 – 35°C is a good temperature to start the fermentation.
2. Like mentioned in the instructions, I use apple cider vinegar. I’ve also used rice vinegar with good results.
3. I don’t have any photos of okara tempeh on hand. Okara tempeh is still on my to-do list for a video or blog post. To give you an idea, okara tempeh is less firm than with whole beans. It’s more spongy, somewhat like a dense bread. It is also a little crumbly although this can be reduced depending on the process. I am still perfecting the method for this. So, the tutorial might come at some point in the future once I am happy with the results.
I hope this helps. 🙂
I tried the recipe step by step yesterday, put the mix between two wooden cutting boards in the over with the light on for 10 hours. The mixture is still quite free in the bags and not in a “chunk”.Out of then oven, I’ve put both ziplocs in the warmest place of my house, but no white mould appearing. Nothing.:( I wonder if this first attempt is a fail. I am really looking forward to making my own tempeh. I live in Saudi Arabia and it is very difficult to find good vegan protein in the stores. The soy beans are also freaking expensive..
Hi, I gave it more time in the oven with the light on and the white mould starts to grow! I am so excited. Should I keep it there for another 24-36 hours? I live in the Middle East, so I can’t simply place it in a warm place in the house as we have AC on. Outside is too hot to put it there to grow more mould. What would you suggest? thanks in advance, Annie
Hi Annie, sorry for my delayed response. I suggest you place it in one of those insulated boxes or just a big box that is lined outside with a blanket to keep some warmth inside. From time to time, open the box for some ventilation. Otherwise if the AC is not lower than 20°C, you could leave it out between two boards and cover them with a kitchen towel. The fermentation will be a little slower at this temperature but if there’s already some mould formation, it should continue to ferment. You can leave it for an extra 6 – 12 hours at this lower temperature. I hope this helps.
I hope this note reaches you. For some unknown reason, I have sent an email before to seek an input from you, it did not get posted, maybe lost in the ether. so I would really appreciate this one can reach you if you would let me know.
I like to find out that you mentioned that you tried the Soy tempeh without Dehull after soaking? I want to find out, do I need to even try to smash the hull to cause it break? Or just soaking 24 hours would be enough? As I do find dehulling is very time consuming, more than an hour it took.
I look forward to hearing from you. Thanks in advance for your answer!
Hi Li,
Sorry about your previous comment. Sometimes the spam filter thinks it’s spam and puts it in the spam folder. I don’t check the spam folder everyday, so I often miss these comments.
I don’t dehull the soy beans. I used to before but I’ve found that the beans still ferment without dehulling and the mould still grows. If you want to dehull all the beans, it is time consuming and will use a lot of water. The difference with dehulled beans, that are broken in half, is that you might get a more compact tempeh.
If you have the means to smash the beans before soaking, you may do that. Otherwise, after soaking them overnight, during the rinsing process some of the hulls (maybe about 1/3) will come off, and this seems to be enough. I’ve had many successful tempeh with minimal dehulling.
to our Host, thanks so much for your reply, I totally would like to try without dehulling. I do not have a good method of break down the beans, it is all manual labor, with a potato smasher, it takes long time as well. If it does not needed, I can still make tempeh, I would be very happy!
I am very grateful fo your input! Many blessings for your support!
You’re very welcome Li. The important thing is not to allow condensation to form in the bags. Condensation will prevent the mould from growing properly. So make sure the beans are dry and not too warm when you place them in the bags. I hope your tempeh is successful. 🙂
Hi! thank you for this recipe and clear instructions. It’s really the easiest tempeh recipe I’ve ever tried. Now it’s my new favorite
Thank you!
Ever since I saw your youtube video on tempeh I have wanted to try. Finally took the plunge, ordered starter from the website you recommended, and made tempeh from chickpeas (I buy large bags of them for cooking so much easier to use them than soy beans). My oven doesn’t have a light, so instead I kept the boxes near a radiator instead. I was worried not seeing anything happening after the first day (monday), but I simply left it there to see what happens. Today is Thursday (3 days later) and they have grown perfectly into white “cakes”. I’ve sliced them and frozen them for later use, but I fried one with some soy sauce to try. It’s my first time making and eating tempeh ever! My boyfriend who have had tempeh before said it tasted just like what he has bought in the past, except chickpeas taste different from soybeans. They’re way cheaper than buying tempeh from shop, and really easy too. All round success, thank you so much! Please keep making great videos and recipes like this!
Oooops I forgot to put vinegar in!!!! I knew there was something missing. I have had them in the oven with the light on for 12hrs and they are producing their own heat. Do you think they will still work or be edible? I am devastated I have made a mega batch. Damn pregnant brain.
If the mould has grown properly and no weird smell indicating that the beans have gone off, then the tempeh should be good to use. The vinegar helps the mould to grow quicker reducing the risk of the beans spoiling during the fermentation. But if the mould has grown properly, then you can still use the tempeh. Make sure to freeze it immediately after fermentation.
Can you please do the detailed video or step recipes of okara tempeh? Somehow I couldn’t find it in your blog.
Thank you
Hello. Thanks for the instructions. I made my first batch, but it smells kinda like blue cheese/moldy. How is it supposed to smell?
Great website and video. Very professional, and I appreciate the printable version. I just made my first batch and it worked perfectly. The only thing I changed was that I used a Vitamix on slow, with water, briefly to split the beans. The hulls mostly floated off in the rinse, but I left the ones that didn’t.
Hi!
My final tempeh looks great but smell a little bit like ammonia.. Can I eat it?
No, I wouldn’t recommend eating it!
Thank you for sharing your recipe with us! It’s very easy to follow. I believe I made a quite ok one for the first time, but it has quite a lot of black patches and I am not sure if I like the smell that much. I realized that I only used 1 cup of beans and used 4 tablespoons of vinegar, could that have spoilt the quality of the resulting tempeh?
Thank you so much!
Hi Teenuja,
Thanks a lot for this video, already ordered the starter and can’t wait to try the recipe.
However a have a doubt with the quantities.. can you please advise on the quantities/relation for soy beans, vinegar and starter?
Thanks a lot!!
Ever since I left my comment in January, I have been making more and more tempeh. I was wondering if you know how to make the tempeh less crumbly, it tastes good but breaks really easily. I make them with chickpeas. I wanted to leave them to ferment for longer to firm up, but they have gone grey (which I read from internet sources means that they matured and reached the sporing stage). Unsure what else I can be doing to form a white firm tempeh like yours!
Hello,
Thank you for your recipe, I have followed your instructions but left the bags of chickpea tempeh preparation in the oven with the light on for 36 hours as there was no evidence of heat generation earlier. Now there is a definite mould around the chickpeas but also condensation in the plastic bags. I have removed them from the oven but should I remove the ‘cakes’ from the bags and freeze or leave it for another 12 hours outside the oven covered with a cloth?
Thanks for your help.
Hi I’m just wondering if I could use textured vegetable protein as well
I wanted to update on my previous comment on how my tempeh is rather crumbly and doesn’t make a tight ‘cake’ like yours. I had remade another batch, but this time along with the chopping board on top I put 2 heavy books on top to weigh it down too as I was thinking maybe my chopping board is not as heavy as yours. Came out perfectly, now I have beautiful slices of tempeh in the freezer, with very minimal crumbling! Just sharing for others who may have similar problem! Also it’s the start of summer here in the UK now (20-30oC during daytime) and the tempeh is fermenting very quickly, this batch only took me a day and a half (started on monday afternoon, finished wednesday morning), all at room temperature without any incubator. I suspect at the peak of summer it will be a day or even less.
I made this recipe for the first time and it turned out perfectly! Thank you!
Followed it to a tee – apple cider vinegar at the end of cooking time. Cooled and added the spores and put in plastic bags. Left in the turned off oven for 12 hours and on counter for 36 additional hours.
Thank you! Will definitely make again.
I made this for the very first time using the zip lock bag and glass container methods. The tempeh made in the zip lock bag turned out perfect, white on all sides. The tempeh made in the glass container is good on all sides except the side that did not touch the glass, which created a black layer. Is there a way to get rid of the black layer, or is it safe to eat? The recipe was easy to follow, and I appreciate all the tips!
hello veganlovie.com,
I have some questions about the tempeh starter ( Rhizopus spores ) that you used.
I checked the link where you recommended to get the tempeh starter, and I look to the profile but couldn’t see where this company shipping from? from which country?.
Another thing, how much Rhizopus you used for let say 200gr or 400gr beans?
can you be more specific about it?
Thank you.
Hi!!!! I’m on day two of fermenting and we have LOTS of black spots! You said this is okay???! I’m a little concerned only because I left it to incubate in the oven for more then 12 hours!! I took a picture to share but can’t post it here!!
Hi Jennifer,
Thanks for your comment. I think your problem is the condensation that formed within the bags. I’ve mentioned this to some other commenters above, please read through. If the beans are a little too warm, condensation will form and this prevents the mould from growing properly. It’s okay to have some black spots, but they should only be spots here and there, not entirely or mostly black.
If you’re getting condensation when you’ve just put the beans inside the bag, remove the beans and wipe the bags dry with a paper towel or clean cloth. Then, wait for the beans to cool a little before putting them back in. Also, it’s important to take the beans out of the oven after 12 hours, again because at this point the mould will start generating their own heat. So, if you leave them in the oven beyond 12 hours, condensation is most likely to start forming. Also, I don’t think tempeh that is mostly black due to improper mould formation is safe to eat. I would compost it. I hope this helps.
Hi Teenuja,
I’d like to know how much degrees Celcius your oven should have, when you turn the lights on. I consider storing it in the heating room in my basement.
Thank you very much for this recipe.
Greetings to you! Have you ever made tempeh with chickpeas?
I would prefer chickpeas over soy.
I have not tried it yest but I plan to as soon as I get the dry chickpeas. Thank you for all of your hard work.
Hi. This is my first time making tempeh. I used the starter from amazon that you recommend. I had some problem with moisture and temperature early on as I left the tempeh in the oven longer than 12 hours. I took it out and left them at room temp for 2 days and the tempeh in the ziploc bag is still not fully fuzzy as the mold has not fully cover the beans BUT some part of the mold has already started to turn black. What should I do? Should I just stop the process and freeze it? Is it still salvageable?
Also when cooking, do I need to steam the thawed tempeh before pan frying or is it ok to skip the steaming and fry it immediately?
Thank you!
Hi! Is it definitely 3/4 of a teaspoon not a tablespoon? In the video the size of the spoon seems bigger. Also, is there anythiny I should do diferently when using pinto beans instead?
It’s teaspoon. The process is the same for pinto beans. The important step is to make sure to evaporate all the water from the beans after they’ve been boiled, and make sure you don’t get any condensation in the bags, if you’re using plastic bags.
Thanks for the informative recipe! I remember as a kid in Singapore, my mum would pick out fresh warm tempeh wrapped in Simpoh Air leaves, checking to see if it was fluffy and white. I’m so happy to be able to make my own tempeh while living in Canada since the ones sold in stores are somewhat disappointing. Thank you <3